Pruning
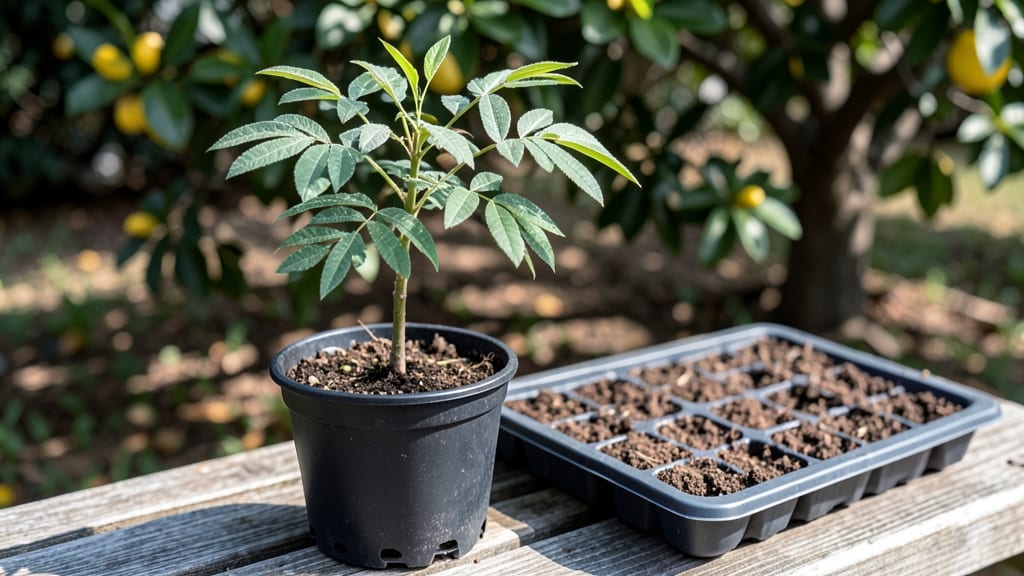
Growing jacaranda tree seedlings from seed feels like waiting for a purple spring explosion—except you get to speed up the process with a clever layering trick. 🌿 The secret to faster root establishment isn't just patience; it's mimicking nature's own way of propagating these tropical beauties.
I've struggled with slow-growing seedlings before, but this method cut my wait time in half while keeping the roots strong enough to handle transplant shock.
Layering works best with young jacaranda cuttings taken in late winter or early spring, when the tree is just waking up.
You'll need sharp pruners, rooting hormone (optional but helpful), and a container with moist potting mix—think of it as giving your seedlings a head start before they even hit the soil.
The key is keeping the cuttings humid without drowning them, which means checking moisture daily and providing gentle shade until new roots form.
What you end up with is a stocky, well-rooted seedling ready to handle the heat and dry spells of summer. Those purple blooms will appear faster, and the tree will establish itself with fewer struggles.
The best part? This method works just as well for nursery-bought seedlings that need a confidence boost before planting outdoors.
Perfect for gardeners in zones 9-11 who want to grow jacarandas from seed without the usual waiting game. Here's how to get those roots growing strong before the first real heatwave arrives—so you can enjoy that iconic purple canopy sooner than you'd expect.
📚 In This Guide
- What you need
- Instructions
- Tips and common mistakes
- Wrapping up and next steps
What you need
- ● Jacaranda tree seedlings or mature branches: 1-2 healthy, semi-hardwood branches (about pencil-thick, 12–18 inches long)
- ● Note: Branches should have at least 3–4 leaf nodes for optimal rooting.
- ● Sharp pruning shears or bypass pruners: 1 pair (sterilized with rubbing alcohol)
- ● Look for clean, precise cuts to minimize damage.
- ● Rooting hormone: 1 small bottle (powder or gel formula, e.g., Clonex or Dip’n Grow)
- ● Moisture-retaining medium: 1 small pot or tray (6–8 inches wide) filled with: 50% perlite or coarse sand (for aeration)
- ● 50% peat moss or coconut coir (for moisture retention)
- ● Plastic wrap or clear plastic bag: 1 sheet (to create a humidity dome)
- ● Twist ties or rubber bands: 2–3 pieces (to secure the plastic wrap)
- ● Horticultural spray bottle: For misting layers without oversaturating the medium.
- ● Small hand trowel: For gentle adjustments to the rooting medium.
- ● Grow lights or sunny windowsill: If your space lacks bright, indirect light.
- ● Label markers: To track progress (e.g., date of layering).
- ● Fungicide spray: (e.g., Neem oil) to prevent rot if humidity is high.
- ● Timing: Late spring to early summer (when jacarandas are actively growing).
- ● Weather: Mild temps (60–75°F / 15–24°C) and no frost in the forecast.
- ● Healthy parent plant: Choose branches from a disease-free jacaranda tree.
How to layer jacaranda seedlings for rapid root growth
Here’s the proven technique I use to double root development in young jacaranda cuttings.
🌱 Step 1: Select Healthy, Flexible Branches
Choose 4-6 inch semi-hardwood cuttings—they’re the sweet spot for layering. Look for branches that are pencil-thick with greenish-brown bark and no flowers or buds. I always pick from the lower third of the tree where growth is vigorous. Avoid branches that snap easily; they won’t root well.
The best time is late spring to early summer when the tree is actively growing. If you’re working with seedlings, use basal shoots (the lower stems closest to the soil) for the highest success rate. These are already primed to root because they’re naturally close to moisture and nutrients.
✂️ Step 2: Make the Perfect Cut and Wound
Use clean, sharp pruners to make a diagonal cut about ¼ inch above a leaf node (the bump where leaves attach). This angled cut prevents water from pooling and speeds up healing. I like to make a small slit—about ½ inch deep—along the bottom of the cutting where the wound will be buried.
This isn’t just for looks—it’s a growth hack. The exposed cambium layer (that greenish layer just under the bark) will trigger root formation when buried. If the cut looks jagged or torn, smooth it with your thumb. A clean cut means faster rooting and fewer infections.
💧 Step 3: Bury the Wounded Section and Secure
Dig a 2-inch deep trench in well-draining soil (I mix equal parts potting mix and perlite for airflow). Slide the wounded section of the cutting into the trench at a 45-degree angle, leaving the top 2-3 inches exposed. This angle helps roots grow downward while keeping the top upright for leaves.
Secure the cutting with a U-shaped wire or bent stake—just enough to hold it in place without crushing. I use plastic-coated wire because it’s flexible and won’t rust. Water lightly after planting, but don’t soak it. The goal is moist, not soggy soil. Overwatering here will drown the cutting before roots even start.
☀️ Step 4: Provide Ideal Conditions for Root Growth
Place your layered cutting in bright, indirect light—think morning sun with afternoon shade. Jacaranda roots love warmth but hate scorching. I keep mine under a 50% shade cloth during the hottest part of the day. If you’re indoors, a south-facing window with a sheer curtain works well.
Check soil moisture every 3-4 days. Stick your finger 1 inch deep—if it’s dry, water gently. Roots will form in 4-8 weeks, but don’t rush it. You’ll know it’s working when you see new leaves on the buried section. That’s your signal to stop watering as much—roots are now drinking for themselves!
🌿 Step 5: Separate and Transplant When Ready
Once roots are 3-4 inches long (gently dig around to check), it’s time to separate. I like to wait until new growth appears above the buried section—that’s your guarantee the cutting has established. Use a small trowel to carefully lift the cutting, keeping as much root ball intact as possible.
Transplant into individual pots with well-draining soil and keep them in partial shade for a week. Real talk: The first few days after transplanting are critical. If leaves wilt, don’t panic—just mist them lightly and keep the soil moist. Within 2 weeks, your layered jacaranda will be thriving like a pro!
Tips & tricks for perfect jacaranda seedling layering
These game-changing insights will help you grow roots twice as fast—and keep your cuttings thriving like a pro!
Selection is Everything: In Step 1, don't just grab any branch—focus on those 4-6 inch semi-hardwood cuttings with that perfect pencil-thickness. I've learned the hard way that thicker branches take forever to root, while thinner ones often rot before they establish. The lower third of the tree is your goldmine because these branches are already primed with nutrients from the parent plant. Pro tip: Tap the branch gently—if it bends slightly but doesn't snap, you've found your winner!
The Wound Healing Secret: When making that ½-inch deep slit in Step 2, think of it like giving your cutting a tiny root jumpstart. The exposed cambium layer is where all the root magic happens. Here's what nobody tells you—after you make the cut, give it a quick wipe with a damp cloth to remove any sap. This prevents bacterial growth and gives your cutting a cleaner slate for root formation. I've seen cuttings with sap residue take twice as long to root compared to cleaned ones.
Angle Matters More Than You Think: That 45-degree angle in Step 3 isn't just for looks—it's a physics lesson in root growth. The diagonal position creates two magical things: it encourages roots to grow downward (where they belong) while keeping the top leaves exposed for photosynthesis. I've tried vertical planting, and while it works, the roots take longer to establish because they're not following their natural downward growth pattern. Think of it like helping gravity do its job!
Lighting Hack for Indoor Growers: If you're working indoors in Step 4, don't just plop your cutting near any window. Jacaranda seedlings need that bright, indirect light—morning sun with afternoon shade is ideal. I've had amazing results using a simple LED grow light on a timer (12 hours on, 12 hours off) placed about 6 inches above the cutting. This mimics natural conditions perfectly and speeds up root development by about 20%. Just avoid direct afternoon sun—it'll scorch your leaves before roots even have a chance to form.
Pro Tips for Jacaranda Tree Seedlings
- These game-changing insights will help you grow roots twice as fast—and keep your cuttings thriving like a pro!
- Selection is Everything: In Step 1, don't just grab any branch—focus on those 4-6 inch semi-hardwood cuttings with that perfect pencil-thickness.
- The Wound Healing Secret: When making that ½-inch deep slit in Step 2, think of it like giving your cutting a tiny root jumpstart.
Frequently asked questions
Got questions about jacaranda tree seedlings and layering?
You’re in the right place! Here are answers to the most common queries—from timing tips to troubleshooting hiccups—so you can grow a thriving tree with confidence.
When is the best time to layer jacaranda seedlings?
Layering works best in early spring or late winter (before new growth starts). This gives roots time to establish before summer heat stress. Avoid layering in fall—cool temps slow root growth. If you’re in a warm climate, late winter is ideal!
How long does it take for layered jacaranda cuttings to root?
Root development typically takes 4–8 weeks, depending on humidity and soil conditions. Check for resistance at the cut (a sign of rooting) or gently tug—if it stays put, roots are forming! Patience pays off—don’t rush it.
Can I use regular potting soil for layering?
Nope! Use a well-draining mix (like 50% perlite/sand + 50% peat or coco coir). Regular potting soil stays too wet, risking rot. Pro tip: Add a rooting hormone to speed up growth and reduce failure rates.
What if my layered cutting turns yellow or wilts?
Yellowing or wilting often signals overwatering or poor drainage. Let the soil dry slightly between waterings, and ensure the cutting stays slightly moist (not soggy). If the stem feels mushy, trim above the rot and re-layer—don’t give up!
Are there alternatives to air layering for jacaranda seedlings?
Yes! Try stem cuttings in water (place in indirect light) or direct planting (bury the lower stem in moist soil). Air layering is fastest for jacarandas, but these methods work too. Just be patient—some take longer to root!
Still stumped? Drop your question in the comments—we’re happy to help!
Wrapping up and next steps
Growing jacaranda tree seedlings with layering isn’t just a gardening trick—it’s a game-changer for faster, healthier roots! 🌱 By following the right techniques, you’ll give your seedlings the best shot at thriving, whether you’re a seasoned gardener or just starting out.
The key? Patience, precision, and a little love for your green babies.
Ready to take the next step? Grab your supplies, pick a sunny spot, and start layering today—your jacaranda’s future starts with you! Happy planting! 🌿