Pruning
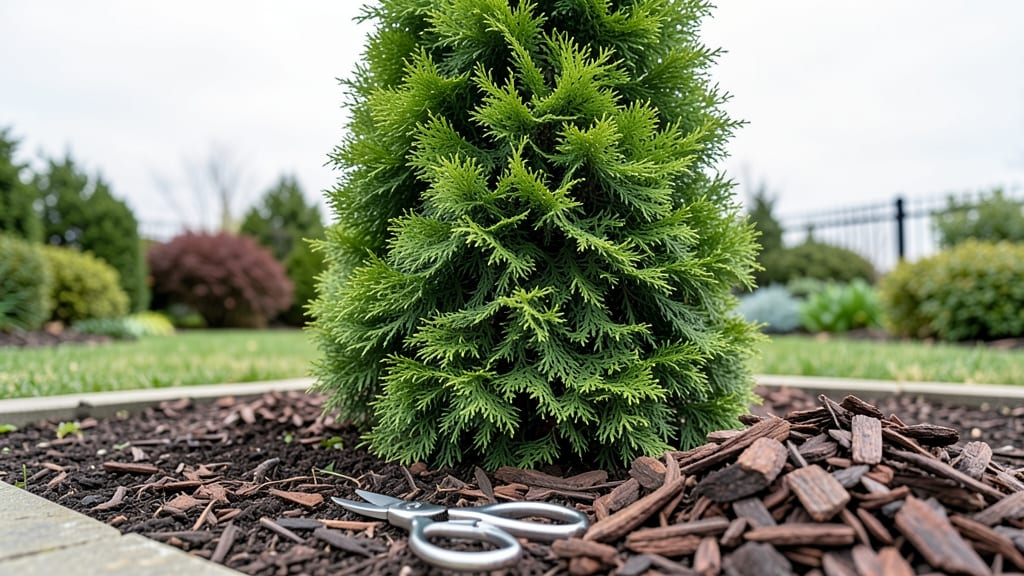
Trimming evergreen trees isn't just about shaping—it's the difference between a scraggly mess and a lush, year-round focal point in your yard. I learned that the hard way when my arborvitae turned into a lopsided monster after a few reckless cuts.
The right technique keeps your evergreens healthy, dense, and looking intentional, whether you're dealing with pines, spruces, or junipers.
You don’t need fancy tools to start—just a sharp pair of bypass pruners for small branches, a hand saw for thicker limbs, and gloves to protect your hands from sap and sharp edges.
Timing matters too: late winter or early spring (just before new growth starts) is ideal for most evergreens, but junipers prefer summer pruning to avoid disease. Safety first: wear eye protection and a respirator mask if you're dealing with dusty or resin-heavy trees.
Focus on removing dead or crossing branches first—they’re the easiest cuts and make the rest of the job cleaner. For shaping, aim to thin out the interior so light reaches all parts of the tree, which keeps the foliage vibrant.
Evergreens don’t sprout new branches where you cut, so think of pruning as sculpting rather than trimming back like deciduous trees. A little precision goes a long way.
The payoff is immediate: your evergreens will fill out faster, resist pests better, and stay looking sharp all year. And if you make a mistake? Evergreens are forgiving—just adjust next time. Ready to transform your yard’s greenery from "meh" to "wow"? Let’s get those shears out.
📚 In This Guide
- What you need
- Instructions
- Tips and common mistakes
- Wrapping up and next steps
What you need
- ● Pruning shears: Bypass pruners (for small branches, 1/4”–3/8” thick), with sharp, stainless-steel blades for clean cuts.
- ● Loppers: For medium branches (3/8”–2” thick), choose bypass loppers (not anvil-style) to avoid crushing.
- ● Pruning saw: For thick branches (2”+ thick), opt for a curved-tooth saw designed for wood to prevent tearing.
- ● Extension pole: A 10–15 ft pole with a saw or pruner attachment for high branches (saves your back!).
- ● Ladder: A sturdy, extension ladder (rated for your height + 3 ft overhang) with non-slip feet.
- ● Gloves: Heavy-duty, cut-resistant gloves (like those rated ANSI A3/A4) to protect from thorns and sap.
- ● Safety glasses: Protect your eyes from debris—ANSI Z87.1-rated is the gold standard.
- ● Work boots: Closed-toe, slip-resistant footwear with ankle support for stability.
- ● Disinfectant: 70% isopropyl alcohol or a pruning sealant (like Tanglefoot Tree Wound Pruning Seal) to prevent disease spread.
- ○ Plastic bags or bucket: For collecting clippings (optional but handy for composting or disposal).
- ● Rope or twine: To secure branches during trimming (helpful for large limbs).
- ● Marking spray: Non-toxic paint (e.g., white or pink) to mark cuts before trimming.
- ● First-aid kit: Bandages, antiseptic wipes, and tweezers (just in case!).
- ● Timing: Trim evergreens late winter to early spring (just before new growth starts) for best results.
- ● Weather: Choose a dry, calm day (no rain or wind) to avoid slipping or spreading disease.
- ● Safety briefing: Clear the area of pets, kids, and bystanders—evergreen trimming can be unpredictable!
- ● Tree health check: Inspect the tree for disease, pests, or dead branches before trimming.
Step-by-Step guide for trimming evergreen trees
Shaping evergreens properly keeps them healthy and looking sharp all year.
Prepare Your Tools and Safety Gear
Start by gathering your tools: a sharp pair of bypass pruners for smaller branches, loppers for medium-sized limbs, and a handsaw for thicker branches over ½ inch in diameter. I always wear heavy-duty gloves to protect my hands from sharp needles and splinters. Safety glasses are a must—evergreen branches can snap back unexpectedly.
Check your tools before you begin. Dull blades tear bark and damage the tree, so sharpen your pruners and loppers if needed. A clean, sharp cut heals faster and looks better. I like to wipe down my tools with rubbing alcohol before starting to prevent spreading disease between cuts.
Assess the Tree and Plan Your Cuts
Step back and examine the tree from all angles. Look for dead, diseased, or crossing branches—these are your top priorities. Dead branches are usually brown or crumbly when touched, while healthy branches feel firm and green. I mark these branches with a piece of twine or a flagging tape so I don’t miss them later.
Next, decide how you want to shape the tree. Evergreens grow year-round, so a little planning now saves time later. Focus on opening up the center to improve airflow and sunlight penetration. Avoid cutting more than ¼ of the tree’s foliage in one season—this can stress the tree and leave it vulnerable to pests or disease.
Make Clean, Precise Cuts
When removing a branch, cut just outside the branch collar—the swollen area where the branch meets the trunk. This ensures the tree can seal the wound properly. For small branches, use your pruners and make the cut at a 45-degree angle about ⅛ inch above a bud or lateral branch if you’re shaping.
For larger branches, use the three-cut method to avoid tearing the bark. First, make an undercut about 6-12 inches from the trunk on the outer side of the branch. Then, cut through the branch from the top, leaving a small stub. Finally, remove the stub by cutting just outside the branch collar. This prevents the weight of the branch from tearing the trunk as you remove it.
Clean Up and Maintain the Tree
After trimming, remove all debris from the ground and around the tree. Leaving branches or clippings can attract pests or disease. I like to use a tarp to collect the debris for easy cleanup. Rake the area thoroughly to ensure no small branches or needles are left behind.
Finally, give the tree a good watering if it hasn’t rained recently. Evergreens lose moisture through their needles, and trimming can increase water loss. Water deeply but avoid soaking the soil—evergreens prefer well-draining soil and can rot if overwatered. Monitor the tree in the weeks following pruning for any signs of stress or new growth.
Tips & tricks for perfect evergreen tree trimming
Trimming evergreens isn't just about aesthetics—it's about keeping your trees healthy and vibrant. Here's what I've learned from years of pruning to make the process smoother and more effective.
Tool Sharpness is Non-Negotiable: In Step 1, when you're preparing your tools, take an extra minute to check the sharpness of your pruners and loppers. A dull blade doesn't just make work harder—it tears the bark and creates larger wounds that take longer to heal. I keep a small pocket knife in my tool bag just for sharpening on the go. For larger branches over ½ inch, make sure your handsaw is sharp too; a dull blade can make the three-cut method in Step 3 much more difficult and dangerous.
The Branch Collar is Your Best Friend: When you're making those precise cuts in Step 3, pay special attention to the branch collar—the swollen area where the branch meets the trunk. Cutting just outside this collar (about ⅛ inch) is crucial because it allows the tree to naturally seal the wound. I've seen too many trees develop cankers from improper cuts—don't make my mistake! If you're unsure where the collar is, look for the slight ridge where the branch meets the trunk, usually about ⅛ inch back from the branch's base.
Season Matters for Health: While the instructions don't specify timing, I always recommend trimming evergreens in late winter or early spring, just before new growth begins. This timing minimizes stress on the tree and allows it to recover quickly. If you must trim in summer, avoid doing it during heatwaves—evergreens lose moisture through their needles, and hot weather combined with pruning can be too much stress. Water deeply both before and after summer trimming to help the tree recover.
Pro Tips for Trim Evergreen Trees
- Trimming evergreens isn't just about aesthetics—it's about keeping your trees healthy and vibrant.
- Tool Sharpness is Non-Negotiable: In Step 1, when you're preparing your tools, take an extra minute to check the sharpness of your pruners and loppers.
- The Branch Collar is Your Best Friend: When you're making those precise cuts in Step 3, pay special attention to the branch collar—the swollen area where the branch meets the trunk.
Frequently asked questions
Got questions about trimming evergreen trees?
You’re not alone! Here are answers to the most common concerns—from timing to tools—to help you tackle the job with confidence.
When is the best time to trim evergreen trees?
The ideal time depends on your goal: light trimming (to shape or remove dead branches) can be done year-round, but heavy pruning is best in late winter or early spring (just before new growth starts). Avoid trimming in fall, as it can stimulate tender new growth that may not survive winter.
What’s the difference between shearing and selective pruning?
Shearing
(using hedge trimmers for a uniform look) is best for formal hedges or topiaries, but it can harm tree health if overdone. Selective pruning (removing specific branches) is healthier for most evergreens—focus on thinning out dense areas and removing dead/diseased branches to improve airflow and sunlight penetration.
How do I know if I’m over-trimming my evergreen?
Watch for these red flags: yellowing needles, stunted growth, or excessive bare spots. Evergreens should retain their natural shape—if yours looks too sparse or uneven, you’ve likely cut too much. A good rule: Never remove more than 25% of the foliage in one season.
Can I trim evergreens in rainy or cold weather?
Avoid trimming when wet branches (rain/snow) are slippery or when temps drop below 40°F (4°C). Cold stress weakens trees, and wet conditions can spread disease. If you must work in damp conditions, sterilize tools with rubbing alcohol between cuts to prevent fungal infections.
What should I do if I accidentally cut into old wood?
Don’t panic! If you’ve cut into woody stems (not just foliage), the wound will seal naturally over time. To minimize damage: use sharp tools for clean cuts, and avoid over-pruning in one session. Seal large wounds (over ½ inch) with pruning sealant to prevent pests or disease.
Wrapping up and next steps
Trimming evergreen trees isn’t just about aesthetics—it’s about health, safety, and long-term beauty. With the right tools, timing, and techniques, you can keep your trees thriving year-round while shaping them to perfection. Remember, patience and precision go a long way! 🌲✨
Ready to tackle your next pruning project? Start small—pick one tree, gather your supplies, and take it step by step. Before you know it, your evergreens will be the envy of the neighborhood! For more tips, check out our pruning guide or consult a local arborist for expert advice.