Planting
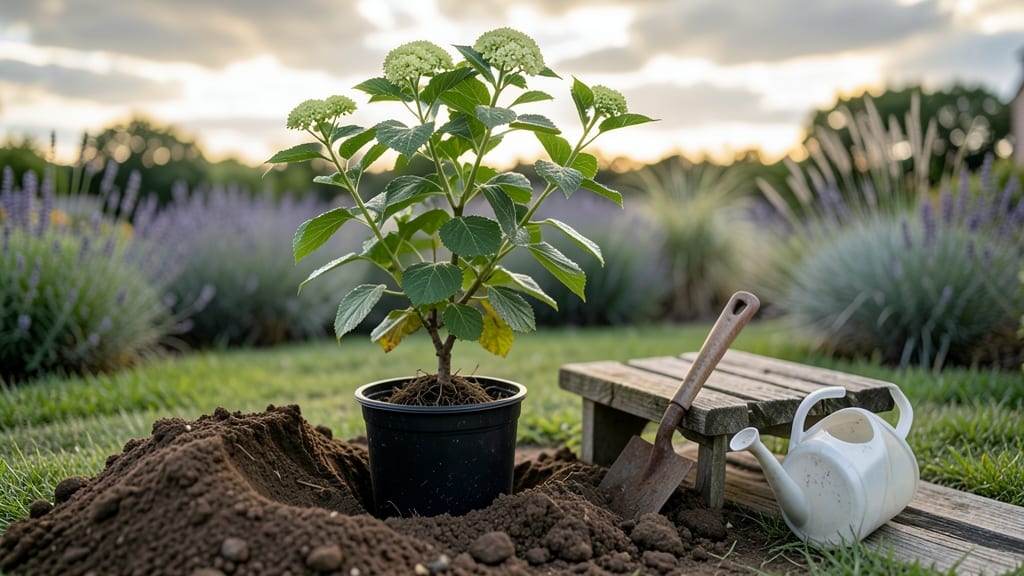
Planting a hydrangea tree means transforming your yard into a summer-long floral show—if you nail the sunlight and soil foundation. I learned this the hard way after my first hydrangea wilted under too much afternoon sun, but now my panicle hydrangeas bloom from June through frost.
The secret isn’t just digging a hole; it’s matching your variety to the right spot and preparing the soil to hold moisture without drowning roots.
Start with the right hydrangea type: bigleaf varieties (like 'Endless Summer') thrive in partial shade with moist, acidic soil, while panicle types (such as 'Limelight') handle full sun and adapt to different soil pH. Dig a hole twice as wide as the root ball but only as deep—planting too deep suffocates the roots.
Amend the native soil with compost or peat moss to improve drainage and water retention, especially in heavy clay or sandy soils.
After planting, water deeply to settle the soil and eliminate air pockets, then mulch with 2-3 inches of organic material to keep roots cool and conserve moisture. The first year is critical: hydrangeas need consistent watering, about 1-2 inches per week, but avoid soggy soil.
Within months, you’ll see new growth, and by next summer, those vibrant blooms will make your neighbors take notice.
Timing matters too—spring or early fall planting gives roots time to establish before extreme heat or cold. Avoid planting in late summer or winter when stress increases. Whether you’re adding color to a shady corner or brightening a sunny border, this method works for any hydrangea variety.
Ready to turn your yard into a blooming masterpiece?
📚 In This Guide
- What you need
- Instructions
- Tips and common mistakes
- Wrapping up and next steps
What you need
- ● Hydrangea tree (Oakleaf, Panicle, or Smooth Hydrangea) – Choose a healthy, potted specimen (3–5 gallons) from a nursery.
- ● Garden trowel or shovel – For digging the planting hole (6–8 inches wider than the root ball).
- ● Garden gloves – To protect your hands from thorns (some varieties!) and soil.
- ● Compost or well-aged manure – 2–3 gallons to enrich the soil.
- ● Mulch (pine bark or shredded leaves) – 2–3 inches to retain moisture and regulate soil temperature.
- ● Watering can or hose with a gentle spray nozzle – For thorough hydration.
- ○ Staking materials (optional but helpful for young trees) – 1–2 bamboo stakes + soft plant ties.
- ● Soil pH tester – Hydrangeas love acidic soil (pH 5.2–6.0); adjust with sulfur if needed.
- ● Slow-release fertilizer (10-10-10 or acid-loving blend) – Sprinkle lightly around the base post-planting.
- ● Epsom salt (magnesium sulfate) – 1 tablespoon mixed into water for vibrant blooms (use sparingly!).
- ● Planting hole liner (landscape fabric) – Prevents soil mixing with surrounding earth (great for clay-heavy areas).
- ● Pruning shears – For trimming dead or damaged branches before planting.
Step-by-Step guide for planting a hydrangea tree
Here’s how to establish your hydrangea tree for vibrant blooms year after year.
Choose the Right Location and Prepare the Site
Hydrangeas thrive in partial shade to full sun, depending on your climate. In hotter regions, they prefer morning sun and afternoon shade to prevent leaf scorch. Test your spot by observing how much sunlight it gets—6 hours of light is ideal, but avoid deep shade, which weakens blooms.
Clear the planting area of weeds and rocks, then loosen the soil to a depth of 12-18 inches with a shovel. Hydrangeas love well-draining, slightly acidic soil (pH 5.5-6.2). If your soil is heavy clay, mix in 2-3 inches of organic compost to improve aeration and moisture retention. The hole should be twice as wide as the root ball but no deeper—this encourages roots to spread horizontally rather than settle too low.
Plant the Hydrangea Tree at the Correct Depth
Gently remove the hydrangea from its container and loosen any circling roots with your fingers. Place it in the hole so the top of the root ball sits level with the surrounding soil—burying too deep can suffocate the plant, while planting too high risks poor stability. Fill the hole halfway with soil and press lightly to eliminate air pockets.
Water deeply to settle the soil around the roots, then add the remaining soil, tamping gently as you go. Avoid compacting the soil too firmly—hydrangeas need room for roots to expand. Once planted, create a 2-3 inch deep watering basin around the base to direct moisture straight to the roots. This prevents runoff and ensures consistent hydration during the critical first few weeks.
Water Thoroughly and Mulch for Moisture Retention
Give your newly planted hydrangea 1-2 gallons of water to help the soil settle and encourage root contact. Water slowly at the base to avoid disturbing the soil surface. Over the next 2-3 weeks, keep the soil evenly moist but not soggy—hydrangeas hate drought stress, which causes leaf drop and weak blooms. Check moisture by sticking your finger 1-2 inches deep; if it feels dry, water again.
Spread a 2-3 inch layer of mulch (like shredded bark or pine straw) over the soil surface, keeping it 3-4 inches away from the trunk to prevent rot. Mulch conserves moisture, regulates soil temperature, and suppresses weeds. Replenish mulch annually in late winter to protect roots from freezing temperatures. Avoid piling mulch too high—this can smother the plant and attract pests.
Provide Ongoing Care for Strong Growth and Blooms
Fertilize in early spring with a balanced, slow-release fertilizer (10-10-10) to support new growth. Hydrangeas are heavy feeders, but avoid overdoing it—too much nitrogen leads to lush foliage at the expense of flowers. In late spring or early summer, apply a low-nitrogen, phosphorus-rich fertilizer (like 5-10-10) to encourage blooming. Always water fertilizer into the soil to prevent root burn.
Prune your hydrangea immediately after flowering (or in late winter for dormant varieties) to shape the tree and remove dead or crossing branches. Cut back old wood (last year’s growth) by one-third to stimulate new blooms. For largeleaf hydrangeas, prune lightly—these beauties flower on old wood, so aggressive cuts reduce next year’s flowers. Wear gloves; hydrangea leaves can irritate skin.
Monitor for Pests and Adjust Care as Needed
Keep an eye out for aphids, spider mites, or scale insects, which thrive in dry conditions. Treat infestations early with neem oil or insecticidal soap, applied in the evening to avoid harming beneficial insects. Yellowing leaves often signal overwatering or poor drainage—let the top 1-2 inches of soil dry out between waterings in summer. If leaves wilt despite moist soil, your hydrangea may need more shade or better airflow.
Adjust sunlight exposure gradually if you notice leaf burn (brown, crispy edges). Move the tree to a slightly shadier spot over 2-3 weeks to avoid shocking it. Hydrangeas are adaptable, but sudden changes stress them. With consistent care, your tree will reward you with lush foliage and dramatic blooms for years to come.
Tips & tricks for planting a hydrangea tree
Here's what I've learned from years of growing hydrangeas—these details make all the difference between a struggling plant and one that thrives with stunning blooms.
Location Scouting: When evaluating sunlight in Step 1, pay special attention to how shadows move throughout the day. A spot that gets 6 hours of morning sun but afternoon shade works beautifully in hot climates. I once planted one in full sun only to watch it develop crispy leaf edges—moving it to partial shade within 2 weeks saved it. Use a small whiteboard to track sunlight hours for a week before planting.
Soil Preparation: The 12-18 inch soil loosening in Step 1 is crucial, but don't stop there. Test your soil's pH before planting—hydrangeas need that 5.5-6.2 range for vibrant blooms. If your soil is alkaline, amend with sulfur or peat moss as you mix in the 2-3 inches of compost. I've seen plants with perfect care struggle because their soil was too alkaline.
Watering Strategy: That initial 1-2 gallons of water in Step 3 should be applied slowly over 15-20 minutes to prevent runoff. For the critical 2-3 week moisture period, I recommend using a moisture meter rather than guessing with your finger. Hydrangeas hate drought stress, and consistent moisture is key to root establishment. Consider installing a drip irrigation system for the first season.
Pruning Precision: The timing in Step 4 is everything—prune immediately after flowering for summer-flowering varieties, but wait until late winter for those that bloom on old wood. When cutting back old wood by one-third, make clean cuts just above a bud or lateral branch. I've seen beginners cut too close to the trunk, which can damage the plant's growth center.
Pro Tips for Plant A Hydrangea Tree
- Here's what I've learned from years of growing hydrangeas—these details make all the difference between a struggling plant and one that thrives with stunning blooms.
- Location Scouting: When evaluating sunlight in Step 1, pay special attention to how shadows move throughout the day.
- Soil Preparation: The 12-18 inch soil loosening in Step 1 is crucial, but don't stop there.
Frequently asked questions
Got questions about planting your hydrangea tree? You’re not alone! Here are some of the most common concerns—plus quick, expert-backed answers to keep your blooms happy and healthy.
Can I plant a hydrangea tree in full sun?
Most hydrangea trees (like Hydrangea paniculata) thrive in partial shade—think 4–6 hours of morning sun and afternoon shade. Full sun can scorch leaves or dry out soil, especially in hot climates. If your yard is sunny, plant near a structure or tree for dappled light. Pro tip: Observe your yard’s microclimates before planting!
What’s the best time of year to plant a hydrangea tree?
Spring or early fall are ideal! Planting in spring (after last frost) gives roots time to establish before summer heat, while fall (6–8 weeks before frost) lets roots settle in before winter. Avoid planting in extreme heat or cold—roots need moderate temps to grow. Bonus: Mulch heavily to protect roots in winter.
Can I grow a hydrangea tree in a container?
Yes, but choose a large container (at least 15–20 gallons) with drainage holes and use well-draining potting mix. Panicle hydrangeas adapt best to containers. Repot every 2–3 years and move it to a sheltered spot in winter if temps drop below 20°F. Watch out: Containers dry out faster—water deeply 2–3 times weekly in summer!
Why aren’t my hydrangea tree leaves turning green?
Yellow or pale leaves often signal nutrient deficiencies (like iron or nitrogen) or over/under-watering. Check soil moisture—hydrangeas hate soggy roots but also wilt if thirsty. Fix it: Test soil pH (aim for 5.5–6.5) and amend with compost or a balanced fertilizer in spring. Pest alert: Spider mites or aphids can also cause discoloration—spray with water or neem oil if needed.
Is a hydrangea tree the same as a regular hydrangea bush?
Not quite! While both are Hydrangea species, hydrangea trees (like paniculata or arborescens) have a single trunk and grow taller (6–12 ft), while shrubs are multi-stemmed and bushier. Trees offer year-round interest (some have winter bark or fall color) and work well as focal points. Pick your style: Trees for structure, shrubs for borders!
Wrapping up and next steps
Planting a hydrangea tree is a rewarding experience that brings vibrant blooms and lush greenery to your garden! 🌸 By choosing the right location—balancing sunlight and shade—preparing the soil for optimal drainage, and following proper planting techniques, you’ll set your hydrangea up for stunning growth.
With patience and care, your efforts will soon be rewarded with breathtaking flowers that last all season.
Now that you’re ready to plant, take the next step: mark your calendar for regular watering and maintenance. Before you know it, your hydrangea tree will be the star of your outdoor space! 🌿