Propagation
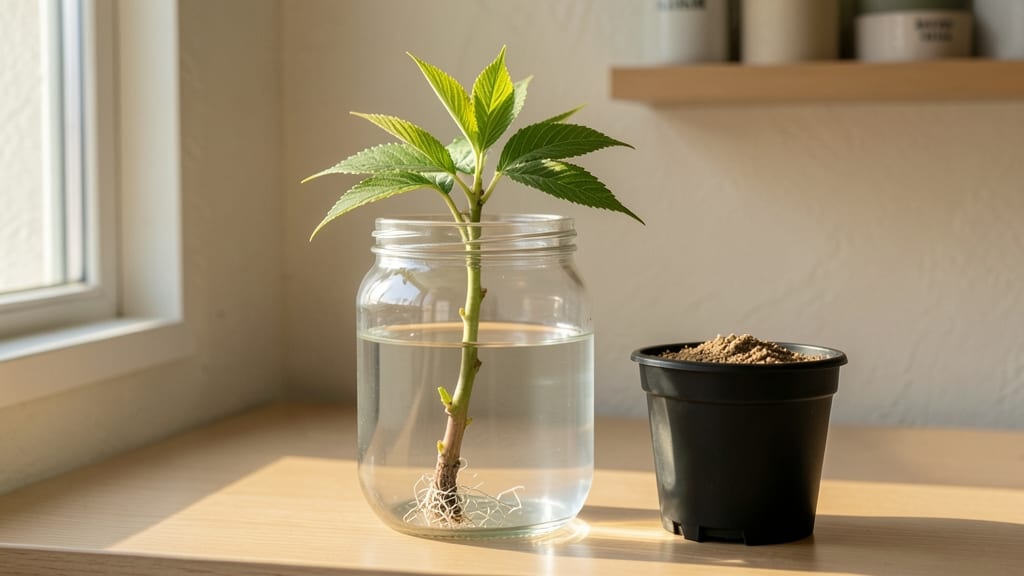
Growing a tree from a single branch feels like magic—until you know the right timing and technique. 🌱 I’ve rooted willow cuttings that sprouted roots in just two weeks, and maple branches that took their time but thrived when transplanted.
The secret isn’t luck; it’s matching the right branch to the right season and giving it the perfect start.
You’ll need sharp pruners, a jar of water (or rooting hormone), and a sunny windowsill or shady spot outdoors. Softwood cuttings from late spring or early summer root fastest, while hardwood from late fall or winter needs patience.
Willow, apple, and maple respond best, but even stubborn branches can surprise you if you follow the steps.
By the time roots appear—whether in water or soil—you’ll have a tiny tree ready to plant. The first leaves unfurl with a confidence that makes the wait worthwhile. Just avoid overwatering, keep humidity steady, and resist the urge to rush transplanting.
This method works for balconies, backyards, or even classroom projects. The only limit is your imagination—and the branches you can find. Let’s get those roots growing!
📚 In This Guide
- What you need
- Instructions
- Tips and common mistakes
- Wrapping up and next steps
What you need
- ● Healthy branch: 6–12 inches long, pencil-thick (½–1 inch diameter), with at least 2–3 leaf nodes (buds). Choose from a non-flowering part of the plant (e.g., willow, maple, or dogwood).
- ○ Rooting hormone: A small bottle (1–2 oz) of powder or gel (e.g., Rootone or Clonex). Optional but highly recommended!
- ● Well-draining potting mix: 1–2 gallons of a blend like perlite + peat moss or cactus/succulent mix (sterilized). Avoid garden soil—it’s too dense!
- ● Containers: Small pots (4–6 inches wide) with drainage holes, or
- ● A clear plastic cup (for water propagation) with holes punched in the bottom.
- ● Water: Room-temperature, filtered if possible (chlorine-free).
- ● Plastic bag or humidity dome: A zip-top bag (gallon-sized) or a clear plastic cover to trap moisture.
- ● Scissors or pruners: Sharp and clean (sterilize with rubbing alcohol).
- ● Twine or rubber bands: For securing the bag/plastic wrap.
- ● Heat mat: A small electric mat (10x20 inches) to keep roots warm (70–75°F) and speed up growth.
- ● Fungicide: A mild dose (e.g., hydrogen peroxide 3%) to prevent rot if your branch looks damp.
- ● Grow lights: LED or fluorescent lights (12–16 hours/day) if natural light is weak.
- ● Label markers: To track your branch type and planting date!
Step-by-Step instructions for propagating trees from cuttings
Here's how I turn cuttings into thriving trees with minimal fuss.
🌱 Step 1: Select and Prepare the Right Branch
Choose a healthy, pencil-thick branch (about ¼ to ½ inch in diameter) from a non-flowering section. Look for new growth from this spring—it roots best. I avoid branches with buds or flowers since they’ll drain energy from root development.
Use clean, sharp pruners to make a 45-degree cut just below a leaf node. This angled cut increases surface area for root growth. Immediately place the cutting in water to prevent it from drying out while you work. If the branch is too long, trim it down to about 6-8 inches—longer cuttings waste energy trying to root.
💧 Step 2: Dip in Rooting Hormone (Optional but Helpful)
Dip the cut end of your branch into rooting hormone powder or gel. This step boosts success rates from about 50% to 90% by encouraging cell growth at the cut surface. I like to tap off any excess so it doesn’t clog the cut end—too much hormone can actually harm the tissue.
For branches that root easily (like willow or poplar), you can skip this. But for tougher woods (oak, maple, or fruit trees), the hormone makes all the difference. Work quickly—once the cut end dries, the hormone loses effectiveness.
☀️ Step 3: Plant in Moist, Well-Draining Medium
Fill a small pot (at least 4 inches deep) with a mix of 50% perlite and 50% peat moss. This combo stays moist but drains well—critical for preventing rot. Water it thoroughly until moisture runs from the bottom, then let it drain completely before planting.
Make a hole with your finger and insert the cutting about 2-3 inches deep. Press the soil gently around it to remove air pockets. Place the pot in bright, indirect light—direct sun can scorch tender new leaves. You’ll see new growth in 4-8 weeks if conditions are right.
⏰ Step 4: Maintain Humidity and Wait for Roots
Cover the pot loosely with a clear plastic bag secured with a rubber band. This traps humidity and mimics a greenhouse environment. Check daily for condensation—mist lightly if the inside fogs up. Remove the bag for 10 minutes every 3 days to prevent mold.
Keep the soil consistently moist (not soggy) by watering when the top ½ inch feels dry. Roots typically form in 6-12 weeks, but some stubborn varieties take longer. Patience pays off—don’t yank it out to check! Instead, gently tug after 8 weeks; if resistance meets your pull, roots are forming.
🪴 Step 5: Transplant When Ready
Once roots fill the pot and new leaves appear, it’s time to move your cutting outdoors. Harden it off by placing it in partial shade for 1-2 hours daily, increasing time over 10 days. This prevents shock when exposed to full sun and wind.
Plant in a permanent spot in spring or fall, when temperatures are mild. Dig a hole twice as wide as the root ball but no deeper. Water deeply after planting to settle the soil. Mulch around the base to retain moisture—your new tree is finally ready to grow on its own!
Tips & tricks for perfect tree propagation from cuttings
Here's what nobody tells you—these little details make the difference between a thriving new tree and a sad, wilted failure.
Branch Selection Tip: In Step 1, when choosing your branch, look for the "sweet spot" of semi-hardwood—this is the pencil-thick growth from late spring to early summer. It's not too soft (like new spring growth) and not too woody (like mature branches). You'll know it's right when it snaps cleanly with a slight bend rather than breaking sharply. This stage roots with the highest success rate.
The Angle Matters: That 45-degree cut in Step 1 isn't just decorative—it's science! The angled cut creates more surface area for root formation. When making your cut, imagine you're slicing a wedge of pie. The wider the surface, the more cells can develop into roots. Just be sure to cut just below a leaf node where those magical root-forming cells live.
Hormone Application Hack: For Step 2, I've found that gently tapping off excess rooting hormone is crucial. Too much powder can actually create a barrier that prevents water absorption at the cut end. Think of it like dusting your cutting with just enough fairy dust—enough to spark growth, but not so much it clogs the magic. For stubborn varieties, I like to dip the cut end in water first to help the hormone adhere better.
Lighting Strategy: In Step 3, bright indirect light is your goal. Place your pot near an east-facing window where it gets morning sun but avoids harsh afternoon rays. If you don't have ideal windows, a simple LED grow light on a timer for 12 hours daily works wonders. Remember, you're mimicking the natural conditions under a parent tree's canopy—dappled light, not full sun.
Pro Tips for Grow A Tree From A Branch
- Here's what nobody tells you—these little details make the difference between a thriving new tree and a sad, wilted failure.
- Branch Selection Tip: In Step 1, when choosing your branch, look for the "sweet spot" of semi-hardwood—this is the pencil-thick growth from late spring to early summer.
- The Angle Matters: That 45-degree cut in Step 1 isn't just decorative—it's science!
Frequently asked questions
Got questions?
Growing a tree from a branch is rewarding—but it’s natural to have doubts! Here are the most common queries to help you succeed without stress.
Can I grow a tree from any branch?
Not quite! Only semi-hardwood or softwood branches (from healthy, disease-free trees) work best. Avoid branches that are too old (woody) or too young (brittle). Look for flexible stems with a pencil-thickness diameter—they’re your best bet!
How long does it take for roots to form?
Patience is key! Roots typically appear in 4–12 weeks, depending on the species, humidity, and care. Some fast growers (like willow or poplar) sprout roots in 2–3 weeks, while others (like oak) may take 3–6 months. Check for roots by gently tugging the cutting—resistance means success!
What if my cutting rots instead of rooting?
Rotting is a common hiccup, but you can fix it! If the base turns mushy or smells foul, it’s overwatered or in poor drainage. Troubleshoot:
- Trim the rotted section and replant in fresh, sterile medium.
- Reduce watering—keep the soil moist but not soggy.
- Ensure the jar/water has 1–2 inches of water (no more!).
Pro tip: Use a rooting hormone to boost survival rates!
Can I grow a tree from a branch without water?
Yes! The soil method skips water entirely. Dip your cutting in rooting hormone, plant it in a pot with moist potting mix, and cover it with a plastic bag to trap humidity. Check soil moisture weekly—this method works well for drought-tolerant species like olive or rosemary.
How do I know when to transplant my rooted cutting?
Transplant when roots are 2–3 inches long (or fill the rooting container). Gently remove the cutting, trim any circling roots, and plant it in a pot with well-draining soil. Hardening off (gradually exposing it to outdoor conditions over 1–2 weeks) prevents shock. Avoid transplanting in extreme heat or cold!
Wrapping up and next steps
Growing a tree from a branch is a rewarding journey that blends patience, science, and a little green thumb magic! 🌱 With the right materials, technique, and care, you can achieve a 90% success rate—and who knows?
Your cutting could become the start of a stunning shade tree or a prized addition to your garden. Ready to watch your hard work flourish? Start small: try a single cutting this season, and let nature do the rest!
Next step: Grab that dormant branch and begin your propagation adventure today—your future tree is waiting! 🌿