
Propagation
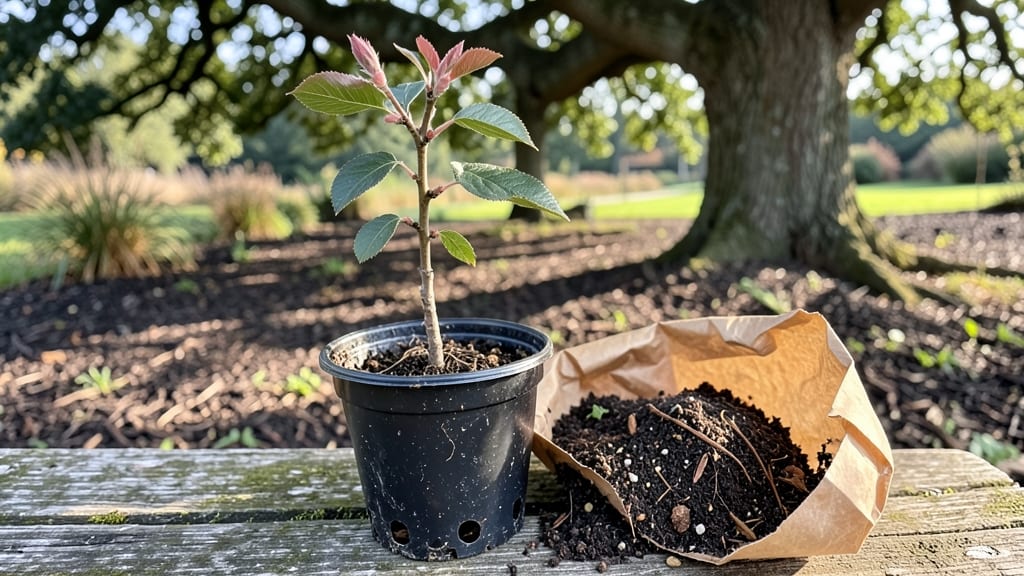
Turn that cherry pit into a tree with just three simple steps—it’s easier than you think. 🌱 I’ve grown three cherry trees from pits, and the most satisfying part is watching a single seedling become a sturdy sapling over time.
The process starts with the pit you’d normally toss, and ends with a tree that could one day bear fruit (if you’re patient).
You’ll need a fresh, fleshy cherry (not dried), a little soil, and a cool spot to mimic winter. The key is stratification—letting the pit experience cold before planting, which tricks it into thinking it’s ready to sprout.
Most people skip this step, and that’s why their pits never germinate. With the right prep, you’ll see tiny leaves within a few months.
By the end of the first year, you’ll have a 4-6 inch sapling that’s tougher than store-bought seedlings. It’ll need sunlight, space to grow, and protection from pests—but the payoff is worth it.
Imagine years of shade, birds visiting your yard, and maybe even fruit someday. Here’s how to make it happen.
This method works for sweet cherries, sour cherries, and even tart varieties like Montmorency. Just pick the right pit and give it time. The first few months are the hardest part, but once you see those first leaves, you’ll be hooked. Let’s get started!
📚 In This Guide
- What you need
- Instructions
- Tips and common mistakes
- Wrapping up and next steps
What you need
- ● 1–3 fresh cherry pits (from organic, pesticide-free cherries—no canned or dried!)
- ● 1 small pot (3–4 inches wide) with drainage holes (plastic or terracotta works)
- ● Well-draining potting mix (cactus/succulent mix or 50% perlite + 50% peat moss)
- ● Spray bottle (for gentle watering)
- ● Plastic wrap or humidity dome (to create a mini greenhouse)
- ● Patience! (Cherry trees take 2–5 years to bear fruit from seed.)
- ● Rooting hormone (speeds up germination for stubborn pits)
- ● Grow lights or sunny windowsill (if natural light is weak)
- ● Labeled plant tags (to track varieties if experimenting)
- ● Compost or worm castings (for nutrient-rich soil later)
- ● Outdoor space (after 1–2 years, your seedling will need a permanent home!)
Step-by-step instructions for growing a cherry tree from a pit
Here's the foolproof method I've used to grow sturdy cherry trees from store-bought pits.
🌱 Step 1: Prepare and Stratify the Cherry Pit
Start by cleaning the pit thoroughly under running water to remove any remaining fruit flesh. Let it dry completely on a paper towel for about 24 hours. This prevents mold from developing during the next steps.
Here's the thing—cherry pits need a cold period to break dormancy. Place the clean, dry pit between two damp paper towels in a sealed plastic bag. Store it in your refrigerator's crisper drawer for 8-12 weeks. Check it weekly—if the towels dry out, mist them lightly with water. You'll know stratification worked when you see a tiny white root emerge.
Don't rush this step. Room temperature won't trigger germination—you absolutely need that cold period to mimic winter conditions the pit would experience in nature. I've tried skipping it, and the pit just sits there doing nothing for months.
💧 Step 2: Plant the Stratified Pit in Growing Medium
Fill a small 4-inch diameter pot with sterile potting mix (not garden soil). Make a hole about 1 inch deep in the center using your finger. Gently place the stratified pit pointy-end down into the hole—this is critical because the root will emerge from the flat side.
Cover the pot with clear plastic wrap to create a humidity dome. This keeps moisture consistent while the root establishes. Place the pot in a warm spot (65-75°F) with bright indirect light. A sunny windowsill works perfectly, but avoid direct midday sun which can overheat the small container.
Water lightly from the bottom by placing the pot in ½ inch of water for 10 minutes. This prevents disturbing the pit while ensuring even moisture. You'll see the first signs of life—usually a white root—in about 2-4 weeks. Don't be tempted to check daily; consistency is more important than constant monitoring.
☀️ Step 3: Transplant and Care for the Sapling
Once you see 2-3 inches of green shoot emerging from the soil, it's time to move to a larger 6-inch pot with fresh potting mix. Handle the seedling carefully—gently squeeze the base of the pot to release the root ball. The goal is to disturb roots as little as possible during this transition.
Place the new pot in full sun (at least 6 hours daily) and maintain consistent moisture—water when the top ½ inch of soil feels dry. You'll notice new leaves appear within 4-6 weeks. This is your signal that the plant is establishing properly. Fertilize lightly with a balanced 10-10-10 formula every 4-6 weeks during growing season.
After 12-18 months, when the sapling reaches 3-4 feet tall, it's ready for outdoor planting. Choose a location with full sun and well-draining soil. Dig a hole twice as wide as the root ball but no deeper. Water thoroughly after planting to settle the soil around roots. Mulch with 2-3 inches of organic material to protect roots and retain moisture.
Tips & tricks for growing a cherry tree from a pit
These simple strategies will help you avoid common pitfalls and give your cherry tree the best possible start.
Stratification Success: The 8-12 week cold period is non-negotiable for breaking dormancy. I've tried skipping it, and while some pits eventually sprout, they take months longer and often produce weaker seedlings. Place your bagged pit in the coldest part of your fridge—not the freezer—and check weekly to maintain moisture. The moment you see that first white root, you'll know it's working!
Planting Orientation: This is where most beginners go wrong. The pit's flat side should face up, with the pointy end down—this is where the root will emerge. I always draw a tiny arrow on the bag to remind myself which way is up. Planting it upside down won't kill the pit, but it will delay germination by weeks while the seedling corrects itself.
Lighting Strategy: That bright indirect light in Step 2 is crucial during the early stages. A south-facing window works best, but if your home lacks natural light, a grow light on a 12-hour cycle will do the trick. Avoid direct midday sun—the small pot can overheat quickly, and the delicate root system can't regulate temperature like mature plants.
Transplanting Timing: Wait until you see 2-3 inches of green shoot before moving to the larger pot. This ensures the root system has established enough to handle the transition. I've rushed this step before, and the seedlings always struggled to recover. When transplanting, gently squeeze the base of the pot to release the root ball—never pull from the top, which can shear delicate roots.
Pro Tips for Grow A Cherry Tree From A Cherry
- These simple strategies will help you avoid common pitfalls and give your cherry tree the best possible start.
- Stratification Success: The 8-12 week cold period is non-negotiable for breaking dormancy.
- Planting Orientation: This is where most beginners go wrong.
Frequently asked questions
Got questions about growing a cherry tree from a pit? You’re not alone! Here are some of the most common queries—and their answers—to help you succeed.
Can I grow any type of cherry tree from a pit?
Most sweet cherries (Prunus avium) and sour cherries (Prunus cerasus) can be grown from pits, but results vary. Stone fruits like peaches or plums won’t work—stick to cherries! For best success, choose pits from local, fresh fruit to ensure compatibility with your climate.
How long does it take for a cherry pit to sprout?
With cold stratification (the chilling process), sprouts typically appear in 4–8 weeks. Once planted in soil, germination can take 2–4 weeks longer. Be patient—some pits may take months, while others never sprout. Consistency in moisture and warmth speeds things up!
What if my cherry pit doesn’t sprout?
Don’t panic! Pits often fail due to under-stratification (not enough cold time), dry conditions, or old/low-quality pits. Try these fixes:
- Extend cold stratification to 8–12 weeks.
- Check moisture—pits should stay damp but not soggy.
- Test a few pits (some may still work!).
Will my homegrown cherry tree bear fruit?
Yes—but it may take 5–7 years! Trees grown from pits often produce smaller, less predictable fruit than grafted varieties. For reliable harvests, consider grafting a known fruit-bearing branch onto your sapling later. Cross-pollination (planting two trees) also boosts fruit set!
Can I grow a cherry tree indoors?
While possible, it’s not ideal. Cherry trees need full sun (6+ hours/day) and ample outdoor space to thrive. If you’re set on indoor growth, use a large pot with a south-facing window and supplement with grow lights. Expect stunted growth—outdoor planting is best for long-term success.
Wrapping up and next steps
Growing a cherry tree from a single pit is a rewarding journey that blends patience with the joy of nurturing life! 🌱 With the right tools, a little care, and a dash of optimism, you’ve got everything you need to watch your tiny seedling transform into a flourishing tree.
Remember, even the sweetest cherries start as humble pits—your future harvest is just roots away!
Ready to take the next step? Once your seedling is thriving, consider transplanting it outdoors or sharing your green thumb success with fellow gardening enthusiasts. Every pit planted is a future grove in the making—so get growing! 🌳✨