
Container Gardens
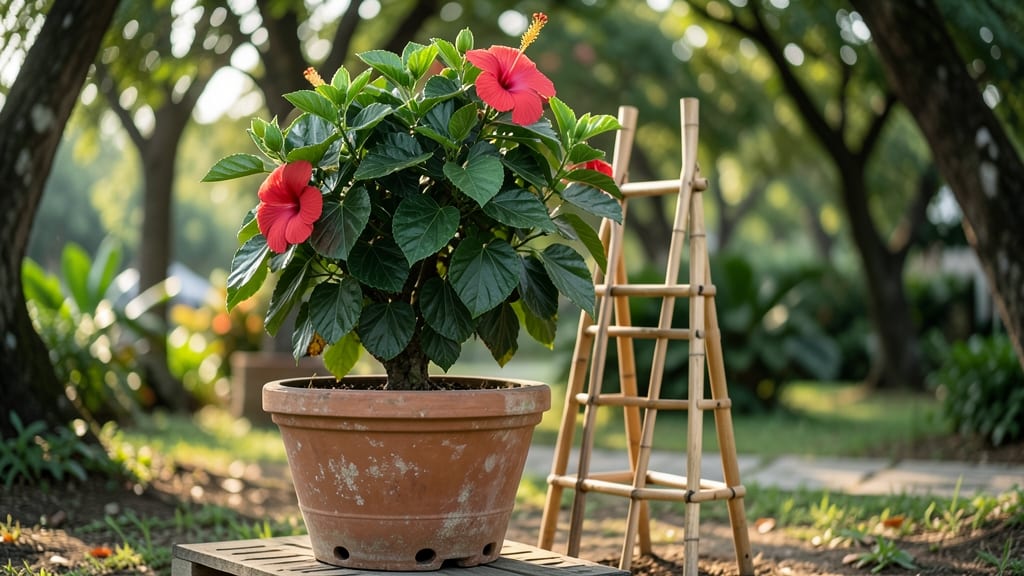
A hibiscus tree in container can be your backyard's boldest statement—think velvety blooms the size of dinner plates, thriving in just a few square feet of space. 🌺 I learned the hard way that cramming one into a tiny pot leads to root-bound misery, but the right setup transforms it into a foolproof small-space superstar.
The secret? Matching container size to the plant's ambition: a 5-gallon pot for dwarf varieties, 15+ gallons for standard types, and fabric pots for better drainage.
Sunlight is non-negotiable—6+ hours of direct sun daily—or you'll get leggy stems and few blooms. My tropical hibiscus now bursts with flowers from spring to frost because I moved it to a south-facing spot after my first failed attempt in partial shade.
Well-draining soil (think 60% potting mix, 30% perlite, 10% compost) prevents root rot, while a balanced liquid fertilizer every 2 weeks fuels those showstopping blooms.
Pruning isn't just about shape—it's about encouraging more flowers. Cut back leggy growth in early spring, and deadhead spent blooms all season. In colder zones, bring potted hibiscus indoors before frost or wrap the container for extra insulation.
The payoff? A plant that stays compact, blooms like crazy, and outshines anything in the neighborhood.
Even in small patios or balconies, this tropical beauty thrives with the right care. Let's get yours growing—no yard required!
📚 In This Guide
- What you need
- Instructions
- Tips and common mistakes
- Wrapping up and next steps
What you need
- ● Container: A large pot (at least 18–24 inches in diameter) with drainage holes. Opt for terracotta, ceramic, or fiberglass for heat retention.
- ● Potting Soil: 3–5 gallons of well-draining, acidic potting mix (pH 5.5–6.5). Mix in perlite or orchid bark (10–20%) for aeration.
- ● Hibiscus Plant: A dwarf or tropical hibiscus variety (e.g., Hibiscus rosa-sinensis ‘Compact Star’ or Hibiscus syriacus). Choose a healthy, 1–2 gallon plant from a nursery.
- ● Fertilizer: A balanced, slow-release fertilizer (10-10-10 or 20-20-20) or an organic option like fish emulsion (apply every 4–6 weeks).
- ● Mulch: 1–2 inches of pine bark or coconut coir to retain moisture and regulate temperature.
- ● Garden Gloves – Protect your hands from thorns and soil.
- ● Trowel or Spade – For planting and soil adjustments.
- ● Watering Can or Hose with Nozzle – Hibiscus loves deep watering (1–2 gallons per week).
- ● Pruning Shears – For shaping and maintaining size (sterilize blades with rubbing alcohol).
- ○ Support Stake or Trellis – Optional for tall varieties to prevent toppling.
- ● Container Saucer or Tray – Catches excess water and prevents mess.
- ● Slow-Release Moisture Granules – Helps retain water in hot climates.
Step-by-step guide for growing a compact hibiscus in containers
Here's how to keep your tropical hibiscus thriving in limited space—no yard needed.
🪴 Step 1: Choose the Right Container and Drainage
Select a container at least 18-24 inches wide with drainage holes—hibiscus roots need room to expand but hate soggy feet. I prefer heavy ceramic pots because they stabilize the plant better during wind and prevent tipping. Add a saucer underneath to catch runoff, but empty it after watering to prevent root rot.
The container must be wide enough for the root system to spread. A 24-inch diameter pot gives mature hibiscus enough space to grow compactly without becoming top-heavy. If you're using a smaller pot, expect slower growth and more frequent repotting every 2-3 years.
🌱 Step 2: Prepare the Soil and Planting Mix
Fill the container with a mix of 60% well-draining potting soil, 30% perlite or pumice, and 10% compost. Hibiscus roots need excellent aeration to prevent rot, so avoid garden soil—it compacts and suffocates roots. I always pre-moisten the mix before planting to help the roots establish without initial shock.
Add a handful of slow-release fertilizer at the bottom of the pot to provide nutrients during the first few months. Hibiscus are heavy feeders, so this head start prevents nutrient deficiency symptoms like yellowing leaves or stunted growth. Press the soil lightly around the root ball to eliminate air pockets but don't compact it.
☀️ Step 3: Position for Maximum Sunlight and Airflow
Place your hibiscus in a location with full sun exposure (6-8 hours daily). A south-facing window or patio works best, but if you're indoors, supplement with a grow light for 12-14 hours daily. Hibiscus flowers won't open without enough light—you'll see buds form but drop off if the plant isn't getting sufficient brightness.
Ensure good airflow by spacing containers 2-3 feet apart to prevent fungal diseases like powdery mildew. If you're growing hibiscus indoors, use a small fan on low setting near the plant for 1-2 hours daily to mimic outdoor breezes. This strengthens the stems and encourages bushier growth.
💧 Step 4: Water Deeply and Maintain Consistent Moisture
Water deeply until water runs out the drainage holes, then wait until the top 2 inches of soil feel dry before watering again. Hibiscus roots are shallow, so they need frequent but thorough hydration. I use a moisture meter to check soil moisture—it's more accurate than guessing by touch, especially in dense potting mixes.
Avoid letting the plant sit in standing water, which causes root rot. If your container doesn't have drainage, add a layer of 2-3 inches of gravel at the bottom before adding soil. This creates a barrier that prevents waterlogging while still allowing excess moisture to drain away.
✂️ Step 5: Prune and Fertilize for Compact Growth
Prune in late winter or early spring by cutting back 1/3 of the previous year's growth to encourage bushier, more compact growth. Use clean, sharp pruners to make cuts just above a leaf node. This also removes any dead or diseased branches, which can harbor pests or diseases that spread quickly in containers.
Fertilize every 4-6 weeks during the growing season with a balanced liquid fertilizer (10-10-10 or 20-20-20). Hibiscus respond well to regular feeding, but avoid over-fertilizing—this leads to excessive leaf growth at the expense of flowers. Reduce fertilization in fall and winter when growth slows.
Tips & tricks for perfect hibiscus tree in containers
Real talk: Container hibiscus need special care to thrive in small spaces—here's what nobody tells you.
Container Size Matters: That 24-inch diameter pot isn't just a suggestion—it's critical for mature hibiscus. Roots spread aggressively, and anything smaller than 18 inches forces you to repot every 2-3 years. I've seen hibiscus in 12-inch pots struggle with stunted growth and poor flowering. If you must use a smaller container, upgrade to 20 inches minimum to give roots room to breathe.
Soil Mix Secrets: The 60-30-10 ratio of potting soil, perlite, and compost isn't arbitrary—it's about aeration. I've ruined multiple hibiscus by using garden soil, which compacts and suffocates roots. Pro tip: Add a handful of coarse sand to your mix if you notice water pooling on top after watering. This improves drainage without altering the overall structure.
Lighting Hacks for Indoors: Those 6-8 hours of sunlight? Non-negotiable. For indoor growers, position your hibiscus within 2 feet of a south-facing window. If that's not possible, invest in a full-spectrum LED grow light—even a basic 12-inch model can provide the 12-14 hours of light hibiscus need. I've seen buds form and drop off when plants don't get enough light, no matter how well you care for them otherwise.
Pruning Precision: When you cut back that 1/3 of growth in late winter, aim for just above a leaf node where new growth will emerge. I learned this the hard way by cutting too close to the stem—it creates ugly stubs and weakens the plant. Sterilize your pruners with rubbing alcohol between cuts to prevent spreading disease. This simple step keeps your hibiscus healthy and flowering for years.
Pro Tips for Hibiscus Tree In Container
- Real talk: Container hibiscus need special care to thrive in small spaces—here's what nobody tells you.
- Container Size Matters: That 24-inch diameter pot isn't just a suggestion—it's critical for mature hibiscus.
- Soil Mix Secrets: The 60-30-10 ratio of potting soil, perlite, and compost isn't arbitrary—it's about aeration.
Frequently asked questions
Got questions about growing a hibiscus tree in a container? You’re not alone—this tropical beauty needs a little extra TLC in small spaces! Here are answers to the most common queries to help you nurture your plant like a pro.
How often should I water a potted hibiscus?
Water your container hibiscus when the top 1-2 inches of soil feel dry. In hot weather, this could mean daily watering, while cooler months may only require every 2-3 days. Overwatering is the #1 killer—ensure pots have drainage holes to prevent root rot.
Can hibiscus trees survive winter in containers?
Most hibiscus varieties (like tropical hibiscus) are not frost-tolerant. If temps drop below 40°F (4°C), move your potted hibiscus indoors near a sunny window or to a sheltered garage. Hardy hibiscus (Hibiscus syriacus) can handle cooler temps but still benefit from winter protection.
What’s the best container size for a hibiscus tree?
A 5-gallon pot is ideal for young hibiscus, while mature plants thrive in 10-15 gallon containers. Hibiscus roots need space to spread—crowded roots = stunted growth. Choose a pot 20-30% larger than the plant’s current root ball for optimal health.
Why are my hibiscus leaves yellowing or dropping?
Yellow leaves often signal overwatering, nutrient deficiency, or pests. Check for:
- Root rot: Ensure proper drainage and avoid soggy soil.
- Nutrients: Feed with a balanced fertilizer (10-10-10) every 4-6 weeks.
- Pests: Inspect for aphids, spider mites, or whiteflies—treat with neem oil if needed.
Can I grow hibiscus from cuttings in a container?
Take 4-6 inch cuttings from healthy stems, remove lower leaves, and dip in rooting hormone. Plant in moist perlite or sand, keep humid (use a plastic bag), and place in bright, indirect light. Roots should form in 4-6 weeks—then transplant to a container!
Pro Tip:
Rotate your container hibiscus quarterly for even sunlight exposure—this prevents lopsided growth and ensures those stunning blooms stay vibrant all season!
Wrapping up and next steps
Growing a hibiscus tree in a container is a rewarding way to bring tropical beauty to small spaces—whether you’re a beginner or a seasoned gardener! 🌿 With the right pot, soil, sunlight, and care, your hibiscus can thrive and even reward you with stunning blooms year after year.
The key is staying consistent with watering, pruning, and winter prep to keep it happy and healthy.
Now that you’re armed with the know-how, why not take the next step? Pick your favorite hibiscus variety, grab a container, and start planting! Share your progress with fellow plant lovers—your green thumb (or budding one!) will inspire others. Happy gardening! 🌸