Pruning
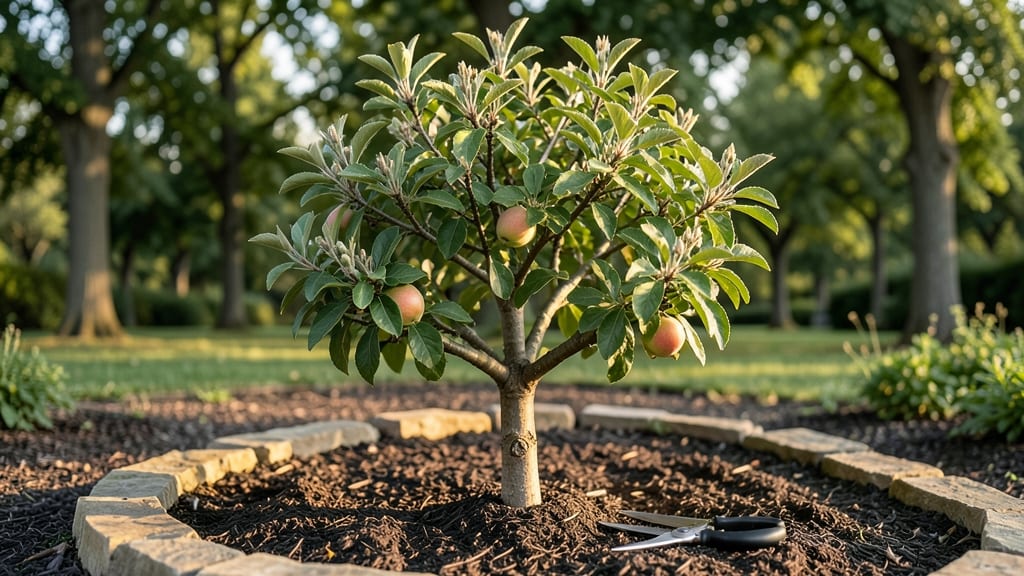
A grafted nectarine tree thrives in your Pacific Northwest yard when you winter-proof its cuts right. I’ve watched my own grafted nectarine survive brutal winters by following a few key steps—steps that keep the graft union strong and the tree productive year after year.
The secret isn’t complicated, but it does require timing and attention to detail that most gardeners overlook.
First, you’ll need sharp pruning shears, a quality sealant like grafting wax, and a clear understanding of when to act. The Pacific Northwest’s wet winters demand extra care: cuts heal slower in damp conditions, and improper sealing can invite disease.
I’ve learned that sealing grafts in early winter—before the worst storms hit—makes all the difference. A properly sealed graft union stays resilient, ensuring your tree keeps bearing sweet, juicy fruit for decades.
By spring, you’ll see new growth emerging from the graft, a sure sign your winter prep worked. The tree’s canopy will thicken, the branches will strengthen, and you’ll harvest fruit that’s sweeter and more abundant than ever.
Even in rainy seasons, your nectarine will stand tall, its roots anchored and its structure unbroken. This is how you turn a delicate graft into a hardy, long-lived tree.
Whether you’re a beginner learning the ropes or a seasoned gardener fine-tuning your skills, these techniques adapt to any Pacific Northwest climate. The key is consistency—check your grafts once a month during winter, adjust your sealant as needed, and your tree will reward you with years of reliable harvests.
Let’s get those cuts winter-ready.
📚 In This Guide
- What you need
- Instructions
- Tips and common mistakes
- Wrapping up and next steps
What you need
- ● Grafted nectarine tree: Ensure it’s healthy, disease-free, and ideally 1–3 years old for best results.
- ● Pruning shears: Bypass pruners (sharp, clean, and 6–8" blade length) for clean cuts.
- ● Loppers: For thicker branches (1–2" diameter) with bypass blades.
- ● Pruning saw: Curved-tooth saw for branches >2" in diameter.
- ● Rubbing alcohol (70% isopropyl): 8 oz bottle to disinfect tools between cuts.
- ○ Pruning sealant: Tree wound paint (optional but helpful for larger cuts).
- ● Grafting tape or parafilm: 1 roll (for securing grafts if repairing damaged unions).
- ● Gloves: Heavy-duty, cut-resistant gloves to protect your hands.
- ● Ladder or step stool: Sturdy and tall enough to reach the tree’s canopy safely.
- ● Bucket or trash bag: For collecting pruned branches (1–2 gallons).
- ● Sharpener: Pruner sharpening stone to maintain tool edges mid-session.
- ● Disposable pruning bag: For on-the-go cleanup (great for small spaces!).
- ● Tree growth regulator: Dormant oil spray (1–2 gallons) to protect against pests post-pruning.
- ● Notebook & pen: To sketch your pruning plan or track cuts.
- ● Safety glasses: For debris protection (always better safe than sorry!).
How to winter-proof your grafted nectarine tree in the Pacific Northwest
Here’s how to protect your grafted nectarine tree from harsh Pacific Northwest winters—so it thrives for years to come.
🌿 Step 1: Prune for Airflow and Sunlight
Start by removing any dead, diseased, or crossing branches. These create entry points for pests and reduce airflow, which can lead to rot. Use clean, sharp pruning shears and make cuts just outside the branch collar—the swollen area where the branch meets the trunk. This ensures the tree heals properly and minimizes stress.
Focus on thinning the canopy to let sunlight reach the center of the tree. Grafted nectarines need good airflow to dry quickly after rain, which is especially important in the damp Pacific Northwest climate. Aim to remove about 20-30% of the foliage—this keeps the tree healthy and reduces winter damage from heavy snow or ice.
🪴 Step 2: Wrap the Trunk and Graft Union
The graft union—the point where the nectarine scion was attached to the rootstock—is the most vulnerable part of the tree in winter. Protect it by wrapping the trunk and graft area with tree wrap or burlap. This shields the bark from temperature swings and sun scald, which can crack the bark and kill the tree.
Start the wrap at the base of the trunk and extend it up to about 4 feet high. Secure it tightly but not so much that it cuts into the bark. If you’re in a particularly cold microclimate, add a layer of straw or mulch around the base of the tree to insulate the roots from freezing ground temperatures.
☀️ Step 3: Mulch the Root Zone
Spread 3-4 inches of organic mulch—like wood chips or straw—around the base of the tree, keeping it 6 inches away from the trunk to prevent rot. This mulch layer acts as insulation, protecting roots from freezing and retaining moisture during dry winter spells. In the Pacific Northwest, where winters can be wet and cold, this extra layer makes a big difference.
Don’t skip this step. A well-mulched tree will recover faster in spring and produce stronger new growth. Just be sure to refresh the mulch each year, as it breaks down over time. If you notice the mulch compacting or sinking, fluff it up to maintain its insulating properties.
⏰ Step 4: Protect Against Late Winter Thaws
The Pacific Northwest’s unpredictable weather—with warm spells followed by hard freezes—can stress grafted trees. If a late-winter thaw is forecast, cover the tree loosely with frost cloth or burlap to shield it from sudden cold snaps. Secure the coverings with stakes or bricks so they don’t blow away but still allow airflow.
Remove the covers as soon as temperatures rise above freezing to avoid trapping moisture, which can lead to fungal issues. Watch for signs of stress, like wilting or discolored leaves, and adjust protection as needed. This extra care ensures your tree stays resilient through the most challenging weather transitions.
✂️ Step 5: Post-Winter Inspection and Cleanup
Once spring arrives, inspect your tree for any damage from winter storms or pests. Prune out any broken or frozen branches immediately to encourage new growth. Look closely at the graft union—if it’s cracked or damaged, the tree may need extra care or even replacement.
Clean up any fallen leaves or debris around the tree to reduce the risk of disease. A tidy base also makes it easier to monitor the tree’s health as it enters its growing season. With proper winter care, your grafted nectarine should reward you with abundant fruit for years to come.
Tips & tricks for perfectly winter-proofed grafted nectarine trees
Winterizing your grafted nectarine tree in the Pacific Northwest doesn't have to be complicated—just strategic. Here's what I've learned from years of protecting these delicate trees through our region's unpredictable winters.
Pruning Precision: When you're thinning that 20-30% of foliage in Step 1, focus on removing branches that cross or rub against each other. These are the weak points that'll split under snow load or ice buildup. I also recommend making your cuts just outside the branch collar—this small detail makes all the difference in how quickly the tree heals. The goal is to create an open center that lets sunlight warm the trunk during winter days, which helps prevent frost cracks.
Graft Union Protection: The 4-foot-high wrap in Step 2 is your tree's best defense against sun scald, which is especially dangerous in our region's bright winter sun. I've seen many trees suffer from bark splitting when the sun heats one side while the other remains frozen. For extra protection in microclimates with extreme temperature swings, consider adding a second layer of tree wrap over the burlap—just make sure it's breathable to prevent moisture buildup.
Mulching Mastery: That 3-4 inches of organic mulch in Step 3 should be your winter insulation blanket. The key is maintaining that 6-inch clearance from the trunk to prevent rot. I've found that wood chips work better than straw in our damp climate—they hold their structure longer and provide better insulation. Pro tip: Add a 2-inch layer of coarse gravel right against the trunk before your mulch. This creates a moisture barrier that prevents the bark from staying wet, which is crucial for preventing fungal diseases.
Thaw Protection Strategy: For Step 4's frost cloth protection, I've learned that timing is everything. Set up your covers before the thaw begins—not after. The temperature swings during these transitions are what damage trees most. I use a simple system of PVC pipes and zip ties to create a hoop structure over the tree, then drape the frost cloth over it. This keeps the covers off the branches while still providing protection. Remember to remove them immediately when temps rise above freezing to prevent moisture buildup.
Pro Tips for Grafted Nectarine Tree
- Winterizing your grafted nectarine tree in the Pacific Northwest doesn't have to be complicated—just strategic.
- Pruning Precision: When you're thinning that 20-30% of foliage in Step 1, focus on removing branches that cross or rub against each other.
- Graft Union Protection: The 4-foot-high wrap in Step 2 is your tree's best defense against sun scald, which is especially dangerous in our region's bright winter sun.
Frequently asked questions
Got questions about your grafted nectarine tree? You’re not alone! Here are answers to common concerns—especially for Pacific Northwest gardeners preparing for winter pruning.
When is the best time to prune a grafted nectarine tree in the PNW?
Prune your grafted nectarine in late winter or early spring (February–March) before buds swell but after the coldest months. This timing balances frost protection with early-season growth. Avoid pruning in fall—it invites disease and weakens the graft union.
How do I protect the graft union from winter damage?
Wrap the graft union (where the nectarine scion meets the rootstock) with tree wrap or bubble wrap, securing it tightly. Mound soil or mulch around the base (but not touching the trunk) to insulate roots. Avoid plastic directly on bark—it can cause rot.
Can I graft a nectarine onto a different rootstock?
Yes! Common rootstocks like ‘Lovell’ (dwarfing) or ‘Nemaguard’ (peach rootstock with nematode resistance) work well. Ensure the rootstock is compatible with nectarines (peach family) and match diameters for successful grafting. Use a whip-and-tongue graft in late winter for best results.
My grafted nectarine’s branches are dying—what’s wrong?
Check for graft failure (scion dying back to rootstock) or bacterial canker (oozing cankers). If the scion fails, re-graft in spring. For canker, prune infected branches 6 inches below the lesion, sterilize tools with rubbing alcohol, and paint cuts with pruning sealant.
Are there cold-hardy nectarine varieties for the PNW?
Look for ‘Springcrest’ or ‘Fantasia’—both tolerate temps down to 10°F (-12°C). Graft onto ‘Lovell’ rootstock for extra cold resilience. These varieties also resist leaf curl, a common PNW issue.
Wrapping up and next steps
Grafting a nectarine tree for winter resilience in the Pacific Northwest is a rewarding project that blends skill with nature’s rhythm.
By selecting the right rootstock, timing your cuts precisely, and protecting your tree with thoughtful techniques, you’re not just pruning—you’re setting the stage for a hardier, more productive fruit-bearing future. 🌱
Now that you’re armed with knowledge, take the next step: roll up your sleeves and practice. Start small with a single graft or volunteer to assist a local orchard—every expert was once a beginner!
The PNW’s climate may be challenging, but with your newfound expertise, your nectarine tree will thrive year after year.