
Pruning
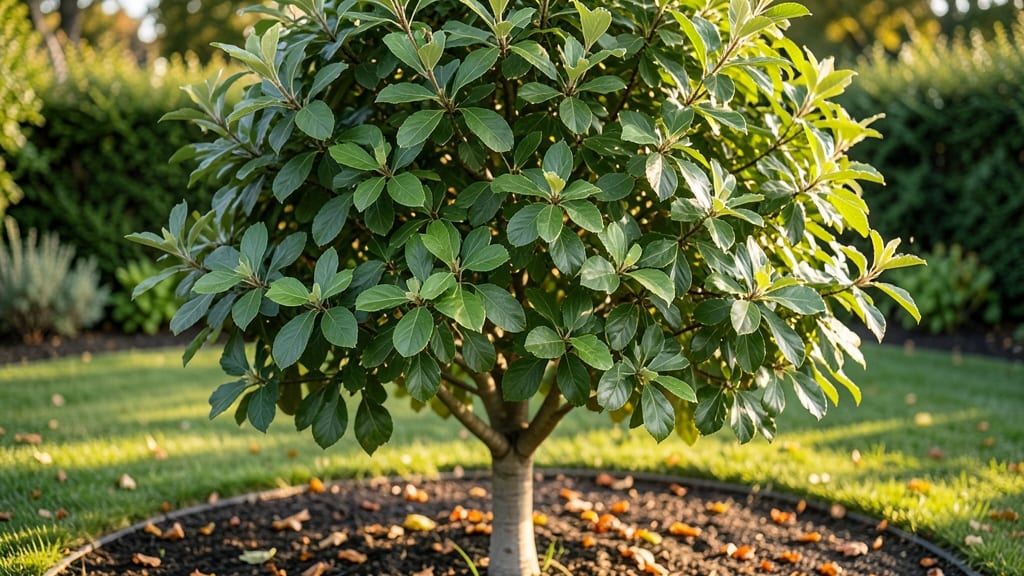
Growing a flowering pear tree in Ontario means frost-proof blooms that outshine even the toughest winters. 🌸 My first tree survived -15°F winters and still burst into spring color every year, proving these trees thrive where others fail.
The secret lies in understanding their hardiness and pruning for resilience, not just beauty.
Ontario's climate demands a few key adjustments: plant in well-draining soil with full sun exposure, and choose varieties like 'Aristocrat' or 'Chanticleer' that handle our zone 3-7 swings. The right pruning timing—late winter to early spring—prevents frost damage while encouraging those showstopping blossoms.
I've learned the hard way that skipping this step means sparse blooms and weak growth.
You'll end up with a tree that becomes your spring centerpiece, covered in delicate white or pink blossoms that last for weeks. The fragrance alone makes it worth the effort, and mature trees even provide shade while keeping wildlife happy with their berries.
The best part? Your neighbors will ask how you keep yours looking so vibrant through our harsh winters.
Local Ontario nurseries like Veseys or Richters carry well-adapted varieties, and many community gardens offer pruning workshops perfect for beginners. The key is starting right—plant in fall for established root growth before winter, and prune when the ground is still frozen to avoid early sap flow.
That first flush of blossoms makes every cold snap worthwhile.
📚 In This Guide
- What you need
- Instructions
- Tips and common mistakes
- Wrapping up and next steps
What you need
- ● Pruning shears: Bypass pruners (sharp, 6–8 inches) – 1 pair (for small branches).
- ● Loppers: Heavy-duty (20–24 inches) – 1 pair (for thicker branches up to 2 inches).
- ● Pruning saw: Curved-tooth saw (for branches 2+ inches in diameter) – 1.
- ● Disinfectant: 70% isopropyl alcohol or diluted bleach solution (1 part bleach to 9 parts water) – small spray bottle.
- ● Garden gloves: Heavy-duty, cut-resistant – 1 pair (to protect from thorns and sap).
- ○ Extension pole: Optional but helpful (for high branches) – 1, 6–10 feet.
- ○ Pruning sealant: (Optional but recommended for Ontario’s cold climate) – small tube (e.g., Tanglefoot Tree Wound Pruning Seal).
- ● Safety gear: Safety glasses and long sleeves – 1 set (to protect from debris).
- ● Best timing: Late winter to early spring (before buds swell) or immediately after flowering (to avoid cutting off next year’s blooms).
- ● Weather check: Prune on a dry, calm day (avoid frost or rain).
- ● Tree health: Inspect for diseased or dead branches (remove these first!).
- ● Local regulations: Check Ontario’s tree protection bylaws if pruning near power lines or in urban areas.
- ● 🌡️ Frost resilience: Avoid heavy pruning in late fall—wait until after the last frost (typically late April–May in most of Ontario).
- ● ✨ Clean cuts: Use one smooth cut (don’t leave stubs) to prevent disease.
- ● 🌿 Mulch after pruning: Add 2–3 inches of mulch around the base to protect roots from winter freeze-thaw cycles.
Step-by-step pruning for a thriving flowering pear in Ontario’s climate
Here’s how to coax abundant blooms from your tree while keeping it strong through harsh winters.
🌿 Step 1: Time Your Pruning for Ontario’s Frost Patterns
Prune your flowering pear tree during its dormant season—late winter or early spring (February to March)—before buds swell but before new growth begins. This timing ensures you’re not removing next year’s blooms, which form on old wood. In Ontario’s climate, pruning too early risks exposing fresh cuts to late frosts, while waiting too long risks removing flower buds.
Watch for leaf buds starting to plump up—this is your cue to stop pruning. If you’re unsure, prune in late February when temperatures consistently stay above 20°F at night. Always use clean, sharp pruners to avoid tearing bark, which invites disease. I like to prune on a dry day when the tree’s sap isn’t flowing heavily—this reduces bleeding and stress.
✂️ Step 2: Remove Dead, Diseased, or Crossing Branches First
Start by eliminating dead, diseased, or damaged branches—these are easy to spot as they’re brown, brittle, or lack leaves. Cut these back to the main trunk or a healthy lateral branch, making your cuts at a 45-degree angle just outside the branch collar. This prevents water from pooling and rotting the wound.
Next, remove any branches that cross or rub against each other. These often create wounds that invite pests and disease. Look for branches growing inward—these will compete for sunlight and weaken the tree’s structure. If a branch is growing straight up, consider thinning it out to improve airflow and light penetration. Remember, you’re sculpting the tree’s shape while preserving its health.
☀️ Step 3: Thin Out to Improve Airflow and Light
Flowering pears thrive with open, airy canopies, so aim to thin branches to let light reach the inner branches. Remove about 20-30% of the tree’s total volume—this encourages stronger growth and better bloom production. Focus on branches that are too close together or those that reduce light penetration to the lower limbs.
When thinning, cut branches back to a side branch or bud rather than leaving a stub. This promotes faster healing and reduces the risk of decay. If you’re unsure which branches to remove, prioritize the smaller branches—they’re easier to prune and less likely to leave large wounds. Step back occasionally to visualize the tree’s shape—you want a balanced, vase-like form that allows sunlight to reach all sides.
⏰ Step 4: Shape for Winter Hardiness and Spring Blooms
After thinning, shape the tree’s outline by shortening overly long branches to maintain a natural, balanced form. Avoid cutting back more than one-third of a branch’s length at once—this prevents shock and encourages vigorous regrowth. For branches longer than 6 feet, make your cuts just above a lateral bud or side branch.
Pay special attention to the lower branches—these often get shaded out and produce fewer blooms. Prune selectively to open up the tree’s interior. In Ontario’s climate, a well-shaped tree recovers faster from winter stress and produces more abundant blooms in spring. Finish by removing any suckers (shoots growing from the base) and water sprouts (fast-growing vertical shoots)—these drain energy from the tree’s main structure.
💧 Step 5: Post-Pruning Care for Ontario’s Unpredictable Weather
After pruning, water deeply if the ground isn’t frozen—this helps the tree recover and encourages root growth. Apply a 2-3 inch layer of mulch around the base (but not touching the trunk) to retain moisture and insulate roots during temperature swings. In Ontario, where winters fluctuate wildly, this extra care makes a big difference.
Monitor the tree for new growth in early spring—this confirms your pruning was successful. If you see excessive water sprouts or weak growth, adjust your approach next year. Avoid heavy pruning in summer or fall, as this stresses the tree and reduces its ability to harden off for winter. With consistent care, your flowering pear will reward you with stunning blooms year after year.
Tips & tricks for frost-resilient flowering pear pruning
Timing and technique are everything when pruning flowering pears in Ontario's climate—here's how to avoid common pitfalls and get the most spectacular blooms.
Timing is Critical: The late February window (when nights stay above 20°F) gives you the perfect balance between avoiding late frosts and preserving next year's flower buds. I've learned the hard way that pruning too early can expose fresh cuts to damaging cold snaps, while waiting too late risks removing those precious blooms that form on old wood. Watch for leaf buds starting to plump up—that's your visual cue to stop pruning. If you're unsure, use a simple thermometer to confirm nighttime temperatures consistently stay above 20°F.
Pruning Technique Matters: When removing branches in Step 2, always make your cuts at a 45-degree angle just outside the branch collar. This angled cut prevents water from pooling in the wound, which is crucial in Ontario's wet springs. I've seen too many pruning mistakes where cuts were made too close to the trunk or left with stubs—both create perfect entry points for disease. For larger branches over 6 feet, use a three-cut method: first make an undercut, then a top cut, and finally remove the branch without tearing the bark.
Visualize Your Cuts: Before making any cuts, step back and visualize the tree's final shape. You're aiming for an open, vase-like form that allows sunlight to reach all branches. In Step 3, focus on removing about 20-30% of the tree's total volume—this might sound like a lot, but it's what creates that airy canopy that prevents fungal diseases. Look for branches that cross or grow inward; these are the first to go. Remember, you're not just pruning—you're sculpting the tree's future bloom display.
Post-Pruning Care Prevents Winter Stress: After your cuts, the 2-3 inch layer of mulch around the base (but not touching the trunk) acts like a thermal blanket for your tree's roots. In Ontario's fluctuating winters, this simple step can mean the difference between a thriving tree and one struggling to recover. Water deeply if the ground isn't frozen—this helps the tree establish new root growth before spring. I've found that trees with proper post-pruning care show new growth in early spring, confirming the pruning was successful.
Pro Tips for Flowering Pear Tree Ontario
- Timing and technique are everything when pruning flowering pears in Ontario's climate—here's how to avoid common pitfalls and get the most spectacular blooms.
- Timing is Critical: The late February window (when nights stay above 20°F) gives you the perfect balance between avoiding late frosts and preserving next year's flower buds.
- Pruning Technique Matters: When removing branches in Step 2, always make your cuts at a 45-degree angle just outside the branch collar.
Frequently asked questions
When is the best time to prune a flowering pear tree in Ontario’s climate?
Prune your flowering pear tree late winter to early spring (February–March), before buds swell but after harsh frosts pass. This timing ensures healthy growth while avoiding late-season pruning wounds that could invite pests. Pro tip: If you must prune later, do so in early fall (September)—just avoid heavy cuts that stress the tree before winter.
How do I protect my flowering pear tree from Ontario’s late frosts?
Flowering pears are frost-hardy, but late blooms can still suffer. Choose late-blooming cultivars (like ‘Aristocrat’ or ‘Cleveland Select’) or use frost cloth on young trees. Avoid pruning too early—wait until after the last frost date (check your zone!). Mulch the base with wood chips (3–4 inches) to insulate roots.
Can I prune a flowering pear tree in summer? What are the risks?
Summer pruning is not recommended for flowering pears—it stresses the tree and reduces next year’s blooms. If you must remove dead branches, do so early morning to minimize shock. Wait until late fall (November) for minimal cuts, but avoid heavy pruning entirely. Exception: Remove disease-infected branches anytime with sterilized tools.
What’s the best alternative to a flowering pear tree for Ontario’s short growing season?
If flowering pears struggle in your microclimate, consider these frost-tolerant alternatives:
- Serviceberry (Amelanchier) – White blooms + edible berries, thrives in zones 3–7.
- Korean Spice Viburnum (Viburnum carlesii) – Fragrant flowers, handles zone 3 winters.
- Dwarf Lilac (Syringa meyeri) – Compact, early blooms, zone 4–7 hardy.
- Redbud (Cercis canadensis) – Stunning pink spring flowers, zone 4–9.
Why aren’t my flowering pear tree’s blooms as vibrant this year?
Dull blooms often signal over-pruning, poor nutrition, or stress. Check for:
- Balanced pruning (never cut >25% of the canopy at once).
- Spring fertilization with 10-10-10 or rose fertilizer (follow package rates).
- Proper watering (deep, infrequent soakings; avoid soggy soil).
- Pest/disease check (aphids or fire blight can reduce blooms).
Wrapping up and next steps
Transforming your Ontario garden with a flowering pear tree is a rewarding journey—especially when you master frost-resilient pruning! 🌸 By following the right techniques, you’ll enjoy vibrant blooms year after year, even in Canada’s unpredictable climate. Remember, timing, sharp tools, and patience are your best friends.
Ready to take the next step? Start small—prune just one branch this season and observe how it responds. Over time, you’ll build confidence and create a stunning, low-maintenance centerpiece for your landscape. Happy pruning! 🌿✂️