
Pruning
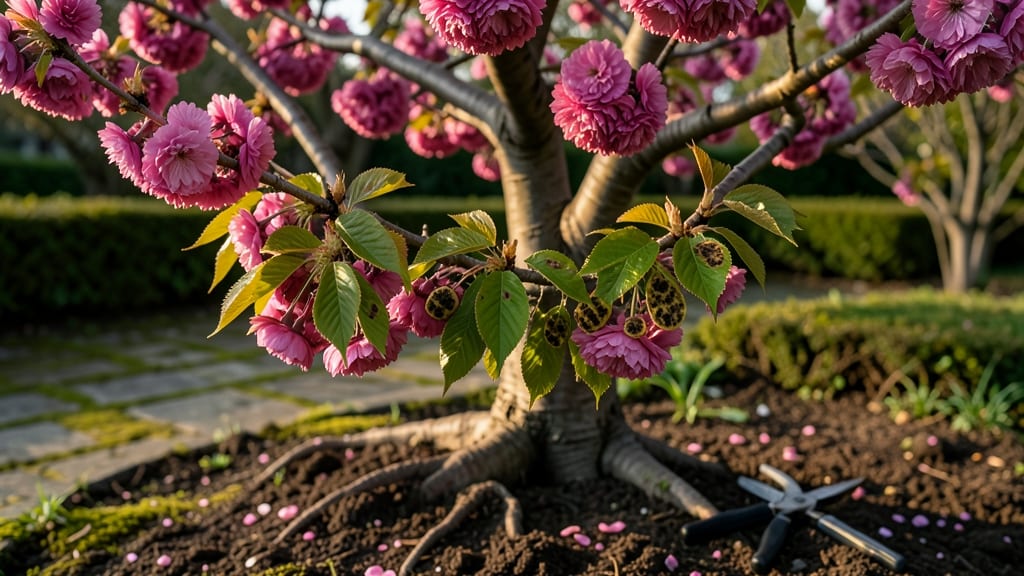
That first sight of blackened branches or sticky sap hints at the flowering cherry tree problems you never imagined—especially after investing so much in its spring blooms. 🌸 The good news?
Late-winter pruning isn’t just about shaping your tree; it’s your best defense against dead wood, fungal diseases like black knot, and even pest invasions that start small but spiral out of control if ignored.
I’ve seen these trees go from skeletal and struggling to bursting with vibrant pink blossoms in just one season after targeted pruning. The key is timing—cutting out diseased limbs in late winter (before buds swell) stops fungal spores from spreading, while removing dead wood prevents borers from moving in.
You’ll need sharp pruners, rubbing alcohol for sterilization, and a sharp eye for the subtle signs of trouble.
What you’ll end up with is a tree that not only looks healthier but actually resists future problems. The right cuts improve airflow, sunlight reaches the inner branches, and those stubborn fungal spots have nowhere to hide.
Plus, you’ll save yourself the heartbreak of watching your tree decline when a little pruning could’ve turned things around.
Works for any mature flowering cherry, whether it’s a 10-year-old showstopper or a young sapling you’re nurturing. Let’s get those tools ready—your tree’s comeback starts with a single cut.
📚 In This Guide
- What you need
- Instructions
- Tips and common mistakes
- Wrapping up and next steps
What you need
- ● Pruning shears: Bypass pruners (for cuts up to ¾ inch in diameter) – look for sharp, stainless-steel blades.
- ● Loppers: 1 pair (for branches 1–2 inches thick) – choose telescoping handles for reach.
- ● Pruning saw: 1 curved-tooth saw (for branches 2+ inches thick) – avoid rust; carbon steel is ideal.
- ● Disinfectant: 70% isopropyl alcohol or a 10% bleach solution (1 part bleach to 9 parts water) – sterilize tools between cuts.
- ● Heavy-duty gloves: 1 pair (cut-resistant, like mechanics’ gloves) – protects from thorns and sap.
- ● Safety glasses: 1 pair – prevents debris from eyes.
- ● Rake or broom: 1 medium-sized – clears debris post-pruning.
- ● Plastic bags or bucket: 1–2 (for collecting waste) – dispose of diseased wood properly.
- ● Pruning sealant: 1 tube (e.g., Tanglefoot Tree Wound Pruning Seal) – only use on large cuts (>2 inches).
- ● Ladder: 1 sturdy, extendable ladder – for high branches; ensure it’s rated for your weight.
- ● Tree wrap: 1 roll (if your tree has sun-scorched bark) – applies after pruning.
- ● Camera/phone: 1 – document progress for future reference!
- ● Weather check: Prune on a dry, calm day (avoid rain for 24 hours before/after).
- ● Tree health assessment: Inspect for dead, diseased, or crossing branches beforehand.
- ● Local regulations: Check if your area requires permits for large-scale pruning.
- ● Safety brief: Ensure no power lines are near the tree!
Step-by-step instructions for revitalizing a stressed flowering cherry tree
Here's how I tackle dead wood and disease—proven methods that work in late winter.
✂️ Step 1: Identify and Mark Problem Areas
Start by examining your tree closely. Look for branches that are completely gray or brown, devoid of buds or leaves—these are dead and need removal. I like to use a small paint marker to circle each branch I’ll prune. This prevents me from missing spots or over-trimming healthy growth.
Check for signs of disease like cankers (sunken, cracked areas) or oozing sap. These are clear indicators that a branch is compromised. If you see these, mark them for removal too. I always work from the inside out, starting with the center of the tree and moving outward. This keeps the tree's structure intact and makes the process cleaner.
🌿 Step 2: Prune Dead and Diseased Branches Properly
Use clean, sharp pruning shears to make cuts just outside the branch collar—the swollen area where the branch meets the trunk. I cut at a 45-degree angle to prevent water from pooling and causing rot. Never leave stubs; this invites pests and disease.
For larger branches, use a pruning saw. Cut slowly and carefully to avoid tearing the bark. After each cut, wipe your tools with rubbing alcohol to prevent spreading disease. I always dispose of pruned material immediately—don’t leave it under the tree, as it can harbor pathogens and attract pests.
💧 Step 3: Apply Protective Measures to Prevent Future Issues
Once the dead and diseased branches are removed, apply a fungicide or copper-based spray to any open wounds. This step is critical for preventing infections. I like to do this on a dry, warm day when the temperature is above 50°F—it helps the spray adhere better and work more effectively.
After pruning, water the base of the tree deeply to help it recover. I use 10-15 gallons of water, spread evenly over the root zone. Avoid wetting the trunk or branches, as this can lead to fungal issues. Mulch around the base with 2-3 inches of organic mulch, keeping it a few inches away from the trunk to prevent rot.
☀️ Step 4: Monitor and Maintain for Healthy Growth
Keep an eye on the tree in the weeks following pruning. Healthy new growth should appear within 4-6 weeks, especially if you pruned in late winter when the tree is just waking up. If you don’t see new buds or leaves by early spring, it might be a sign of deeper issues like root rot or nutrient deficiency.
Continue to monitor for signs of disease or pest activity. If you spot any new problems, act quickly—early intervention is key. I check my trees every 2-3 weeks during the growing season to catch issues before they spread. A healthy flowering cherry tree should reward you with vibrant blooms and lush foliage come spring.
Tips & tricks for perfect late-winter pruning of flowering cherry trees
Late-winter pruning can transform a struggling flowering cherry tree—here's how to avoid common pitfalls and maximize success.
Timing Secret: Late winter is ideal because the tree is dormant but just starting to wake up. Prune right before buds begin to swell—typically in late February or early March in most climates. This timing gives the tree time to heal before spring growth begins. I've learned the hard way that pruning too early (in deep winter) can stress the tree, while waiting too late (into spring) can encourage disease spread.
Tool Prep: Sterilize your pruning tools before you start—wipe them down with rubbing alcohol between cuts. This simple step prevents spreading disease from one branch to another. I also recommend using a sharp pair of bypass pruners for clean cuts; dull tools can crush branches, making wounds more vulnerable to infection. For larger branches, a pruning saw with a fine-tooth blade works best to avoid tearing the bark.
Visual Cues for Healthy Cuts: When making your 45-degree cuts in Step 2, aim to cut just outside the branch collar—the swollen area where the branch meets the trunk. The cut should look like a slanted smile, not a flat chop. This angle helps water run off rather than pool, which prevents rot. I always double-check by running my finger along the cut to ensure it's smooth and clean.
Post-Pruning Care: After pruning, don't forget to apply a thin layer of pruning sealant to larger wounds (over ½ inch in diameter). While some gardeners debate this, I've found it helps prevent moisture loss and infection, especially in our dry climates. The key is to apply it sparingly—just enough to seal the wound without smothering it. Then, water deeply with 10-15 gallons spread evenly over the root zone, keeping the water away from the trunk.
Pro Tips for Flowering Cherry Tree Problems
- Late-winter pruning can transform a struggling flowering cherry tree—here's how to avoid common pitfalls and maximize success.
- Timing Secret: Late winter is ideal because the tree is dormant but just starting to wake up.
- Tool Prep: Sterilize your pruning tools before you start—wipe them down with rubbing alcohol between cuts.
Frequently asked questions
Got questions about keeping your flowering cherry tree healthy and stunning? Here are some of the most common concerns—and how to tackle them!
Why is my flowering cherry tree not blooming this year?
Flowering cherry trees often bloom on last year’s growth, so heavy pruning or stress (like drought or disease) can delay or reduce blossoms. If your tree is young (<5 years), it may still be establishing its root system. Fix it: Prune lightly in late winter, ensure proper watering, and fertilize with a balanced, slow-release formula in early spring.
Can I prune my flowering cherry tree in early spring instead of late winter?
While late winter (dormant season) is ideal, light pruning in early spring is acceptable if you missed the window. Avoid heavy cuts now—it can stimulate new growth that’s vulnerable to late frosts. Pro tip: Wait until after the last frost date for your zone to minimize stress on the tree.
What should I do if my flowering cherry tree has holes or sawdust-like frass?
Those are classic signs of borer infestations (like cherry fruitworm or flatheaded borers), which tunnel into branches. Prune and destroy heavily damaged wood immediately, then apply beneficial nematodes or Bt (Bacillus thuringiensis) spray for larvae. Keep the tree healthy—stressed trees attract more pests!
How do I prevent fungal diseases like powdery mildew on my cherry tree?
Fungal diseases thrive in humid, crowded conditions. Improve airflow by pruning dense branches, water at the base (not overhead), and avoid wetting foliage. If mildew appears, spray with neem oil or a copper fungicide in early morning for best results. Clean up fallen leaves promptly!
Are there disease-resistant flowering cherry tree alternatives?
Yes! If your current tree struggles with pests or disease, consider Prunus serrulata ‘Kanzan’ (resistant to powdery mildew) or Prunus subhirtella ‘Autumnalis’ (blooms later, fewer pest issues). Dwarf varieties like ‘Shirotae’ are also low-maintenance. Always check your local nursery for region-specific recommendations!
Wrapping up and next steps
Caring for your flowering cherry tree doesn’t have to be overwhelming—with the right knowledge and a little effort, you can keep it thriving for years to come! 🌸 Late-winter pruning is your secret weapon against dead wood and disease, ensuring vibrant blooms and a healthy tree.
Whether you’re tackling stubborn branches or preventing fungal spread, your proactive approach will make all the difference.
Ready to take action? Grab your tools, follow the steps we’ve shared, and give your cherry tree the fresh start it deserves. Happy pruning—your tree (and future springtime views!) will thank you! 🌿