
Pruning
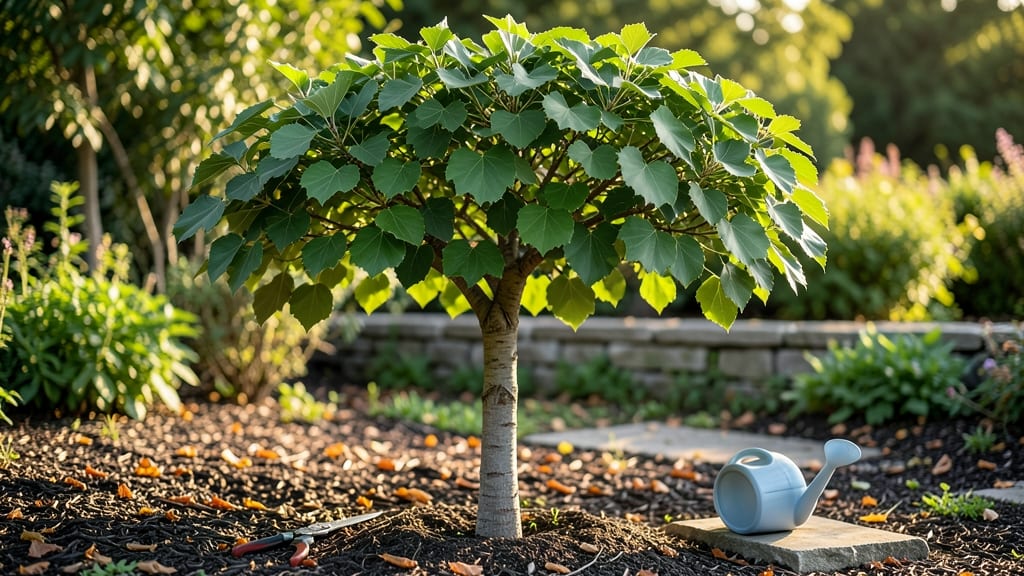
Pruning a Chinese mulberry tree in late winter isn’t just about shaping branches—it’s about giving your tree a fighting chance against Pacific Northwest storms and pests.
I’ve seen these hardy trees go from scraggly to showstopping in just one season after a proper cutback, and the key is timing, technique, and knowing what to leave behind.
The best time to prune is right after last frost, when the tree’s dormant but before new growth starts. You’ll need sharp loppers for thicker branches and a clean saw for anything over 2 inches thick—no jagged cuts here.
The goal? Open up the center for airflow and sunlight while keeping the tree’s natural shape. Mulberries reward patience: a well-pruned tree produces sweeter fruit and fewer pests.
What you’ll end up with is a tree that looks like it belongs in a park, not just your backyard—thicker branches, fewer weak limbs, and a canopy that lets sunlight reach the ground.
The fruit? Juicier and easier to harvest. Plus, birds and bees will thank you for the extra shade and food source. Ready to transform that tangled mess into a Pacific Northwest staple?
This method works for both young trees and mature specimens, though older trees need more gradual pruning to avoid shock. Whether you’re dealing with a 5-year-old sapling or a 50-year-old veteran, the same principles apply. Let’s get those pruners out and make your mulberry tree the star of your landscape.
📚 In This Guide
- What you need
- Instructions
- Tips and common mistakes
- Wrapping up and next steps
What you need
- ● Pruning shears: Bypass pruners (for cuts up to ½ inch thick) or anvil pruners (for thicker branches). Choose sharp, sterilized tools to prevent disease spread. (1 pair)
- ● Loppers: For branches ½ to 1½ inches thick. Opt for ratcheting or bypass-style for precision. (1 pair)
- ● Pruning saw: For branches thicker than 1½ inches. A curved-tooth saw minimizes tear-out. (1)
- ● Disinfectant: 70% isopropyl alcohol or a 10% bleach solution (1 part bleach to 9 parts water) to clean tools between cuts. (Small spray bottle or wipe)
- ● Gloves: Heavy-duty gardening gloves (nitrile-coated for grip) to protect from thorns and sap. (1 pair)
- ● Safety gear: Safety glasses (to shield from debris) and long sleeves/pants (to avoid scratches).
- ○ Marking tools: Colored twine or tape to flag branches for removal (optional but helpful for complex pruning). (Small roll)
- ● Trash bags: Heavy-duty contractor bags (20–30 gallon) for debris disposal. (2–3 bags)
- ● Sealing wax: Pruning sealant (like Tanglefoot Tree Wound Pruning Sealer) for cuts larger than 2 inches to prevent disease. (Small tub)
- ● Ladder: Sturdy, extendable ladder (if your tree exceeds 6 feet). Ensure it’s stable and rated for your weight.
- ● Workbench or tarp: To organize tools and keep your workspace clean.
- ● Camera/phone: To document your tree’s structure before and after pruning (great for tracking progress!).
- ● Best timing: Prune on a dry, cloudy day in late winter (February–early March in the PNW) to minimize stress on the tree. ✨ Pro tip: Avoid pruning if frost or rain is forecasted within 24 hours.
- ● Tree health check: Inspect for dead, diseased, or crossing branches before starting. Look for mushrooms, oozing sap, or discolored bark—these signal trouble.
- ● PNW-specific prep: If your tree is near a storm-prone area, prioritize removing weak or structurally compromised branches first.
Step-by-step guide to revitalizing your Chinese mulberry tree in late winter
Late winter is the perfect time to refresh your Pacific Northwest mulberry—here’s how to do it right.
Assess the Tree for Winter Damage
Start by examining the tree’s structure from all sides. Look for dead, broken, or crossing branches—they’ll be brittle or lack bark. In the Pacific Northwest’s wet winters, fungal issues can also appear as dark, oozing spots on the bark. I always use a small pruning knife to scrape a small section of suspicious bark—healthy wood should be firm and light-colored underneath.
Check for any signs of winter burn, where leaves may have browned or curled. While mulberries are tough, severe damage means those branches won’t recover. Mark these areas with a piece of twine or flagging tape so you don’t miss them during pruning. This is also the time to spot any pest damage, like holes from borers or webbing from mites—common in our damp climate.
Remove Dead and Problematic Branches First
Use clean, sharp pruners to cut out any dead wood at the branch collar—the swollen area where the branch meets the trunk. Never leave stubs; this invites disease. For larger branches over 2 inches thick, I switch to a pruning saw and make the cut just outside the branch collar, following the natural angle of the branch. The goal is to open up the center of the tree to improve airflow and sunlight penetration.
If you find branches rubbing together, remove the smaller of the two to prevent future wounds. In the Pacific Northwest’s windy conditions, this step helps prevent storm damage later. After each cut, wipe your tools with rubbing alcohol to prevent spreading any fungal spores that might be hiding in the bark.
Thin Out the Canopy for Better Light and Airflow
Step back and visualize the tree’s shape—you’re aiming for an open, vase-like form with sunlight reaching the lower branches. Remove branches that grow inward or downward, starting from the bottom and working your way up. I like to keep about 20-30% of the older wood to maintain the tree’s structure while encouraging new growth. This thinning is especially important for mulberries, which can get dense and prone to disease if overcrowded.
For each branch you remove, make your cut just outside a bud that faces the direction you want the new growth to go. This ensures the tree fills in nicely without creating awkward gaps. In the Pacific Northwest’s mild winters, new shoots can start growing as early as late February, so timing your cuts now gives them a head start.
Shape the Tree for Pacific Northwest Conditions
Now’s the time to refine the tree’s outline, focusing on removing any branches that disrupt the natural shape or grow too close to power lines or structures. Mulberries are fast growers, so I always leave some extra length on branches I want to keep—about 6-12 inches beyond the desired final shape. This gives the tree room to fill out before the next pruning cycle.
Pay special attention to the tree’s lower branches. If they’re too low for your space, remove them gradually over a few years to avoid shocking the tree. In the Pacific Northwest, where rain is frequent, keeping the lower canopy open reduces the risk of fungal issues. After shaping, step back and admire your work—the tree should look balanced and ready for spring.
Clean Up and Apply Protective Measures
Rake up and dispose of all pruned branches—never leave them on the ground, as they can harbor pests and diseases. I like to sterilize my tools with a 10% bleach solution (one part bleach to nine parts water) to kill any lingering pathogens. Once everything is clean, apply a thin layer of dormant oil spray to the fresh cuts if you notice any signs of pest activity, like egg masses or sawdust-like frass.
Finally, add a 2-3 inch layer of mulch around the base of the tree, keeping it a few inches away from the trunk. This helps retain moisture and regulate soil temperature, which is especially helpful in the Pacific Northwest’s variable winter weather. Water the tree deeply if the ground is dry, and you’re all set for spring growth.
Tips & tricks for perfect Chinese mulberry tree pruning
Late-winter pruning transforms your mulberry into a thriving Pacific Northwest beauty—here’s how to make every cut count.
Tool Preparation: Before you start, sharpen your pruners and saw—dull tools tear bark, inviting disease. I test my blades by making a clean cut through a piece of newspaper; if it shreds, it’s time to hone them. For larger branches, a pruning saw with a fine-tooth blade glides through wood more smoothly than a coarse one, reducing bark damage. Keep a small bottle of rubbing alcohol handy to wipe tools between cuts, especially when dealing with suspicious branches.
Visualizing the Tree’s Future: In Step 3, when thinning the canopy, step back frequently to visualize the tree’s final shape. I sketch a rough outline on paper first—this helps me spot branches that might look fine up close but disrupt the overall form from a distance. Aim for a balanced, open center that lets sunlight reach all branches. Mulberries respond well to this open structure, producing more fruit and fewer disease issues in our damp climate.
Pacific Northwest-Specific Adjustments: Our region’s windy conditions demand extra attention to branch strength. When shaping in Step 4, prioritize removing branches that grow at sharp angles or are prone to rubbing. Leave the sturdiest branches slightly longer (those extra 6-12 inches) to provide structural support against winter storms. For lower branches that are too close to walkways, remove them gradually over 2-3 years rather than all at once—this prevents shock to the tree.
Post-Pruning Care: After cleaning up in Step 5, don’t forget to inspect the tree’s base for any signs of girdling roots or soil compaction. If you notice roots circling the trunk, gently loosen them with your hands or a root knife. The 2-3 inch layer of mulch should extend out to the tree’s drip line, not just the trunk—this encourages root growth where it’s needed most. In particularly dry late winters, I water deeply once a week to help the tree recover from pruning stress.
Pro Tips for Chinese Mulberry Tree
- Late-winter pruning transforms your mulberry into a thriving Pacific Northwest beauty—here’s how to make every cut count.
- Tool Preparation: Before you start, sharpen your pruners and saw—dull tools tear bark, inviting disease.
- Visualizing the Tree’s Future: In Step 3, when thinning the canopy, step back frequently to visualize the tree’s final shape.
Frequently asked questions
Got questions about pruning your Chinese mulberry tree? You’re not alone! Here are answers to the most common concerns—especially for Pacific Northwest growers looking to revive their trees in late winter.
When is the exact best time to prune a Chinese mulberry tree in the PNW?
The ideal window is late winter (February–early March), when the tree is still dormant but before new growth starts. This timing minimizes stress and disease risk. Avoid pruning in deep freeze or during wet springs—wait for dry, above-freezing days for cleaner cuts.
How much can I safely remove in one pruning session?
For rejuvenation pruning, aim to remove 20–30% of the tree’s total canopy in one session. Focus on dead, diseased, or crossing branches first, then thin out crowded areas to improve airflow. Avoid over-pruning—Chinese mulberries are resilient but can struggle if you remove too much at once.
What if my tree bleeds sap after pruning—is that normal?
Yes! Sap bleeding is common in late-winter pruning, especially in mulberries. It’s harmless and stops once new growth begins. To minimize mess, prune on a dry day and seal larger cuts (>2 inches) with pruning sealant (optional but helpful for wet climates like the PNW).
Can I prune a Chinese mulberry tree in summer instead?
Summer pruning is possible but riskier. If you must, do it after harvest (July–August) to avoid stressing the tree during fruit production. However, late-winter pruning is preferred because it encourages stronger spring growth and reduces pest/disease pressure before the rainy season.
How do I tell if my tree has pests after pruning?
Watch for yellowing leaves, sawdust-like frass, or tiny holes—signs of mulberry pyralid moths or scale insects. If you spot pests, prune and destroy infested branches, then treat with neem oil or insecticidal soap. Healthy pruning (removing dead wood) reduces hiding spots for pests!
Wrapping up and next steps
The Chinese mulberry tree thrives in the Pacific Northwest when given the right late-winter pruning care—boosting resilience, fruit production, and overall health. By following proper techniques, timing, and safety measures, you’ll set your tree up for a vibrant, productive season ahead. 🌿
Ready to take action? Grab your tools, mark your calendar for late February or early March, and give your tree the TLC it deserves. Your future harvest—and happy tree—will thank you!