
Pruning
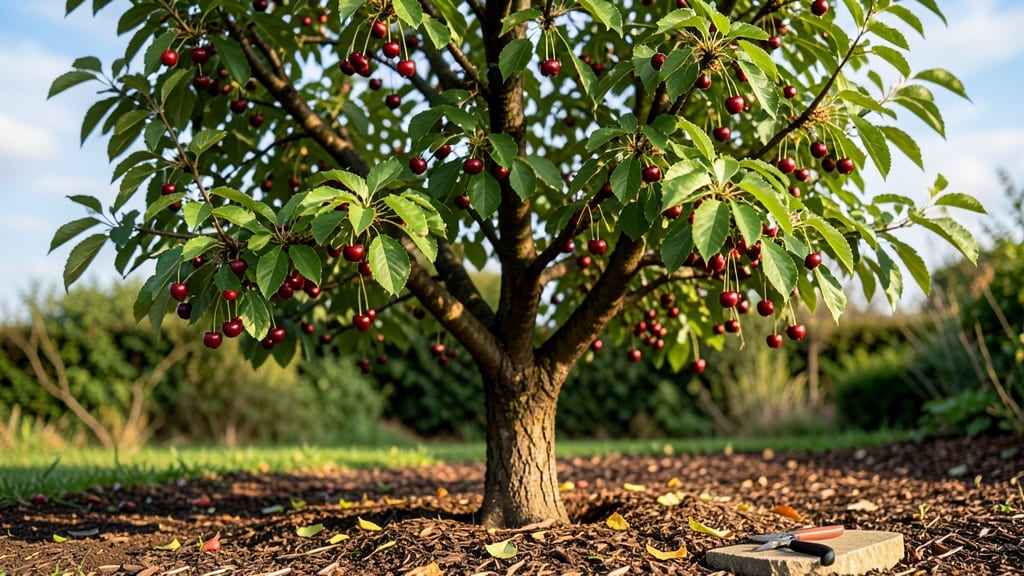
Planting a cherry tree in your backyard isn’t just about fruit—it’s about creating a living centerpiece that transforms your outdoor space into a seasonal masterpiece. 🌸 The right placement turns it from a random tree into the heart of your garden, where birds sing, blossoms drift in spring, and summer’s shade becomes your favorite spot for morning coffee.
Start by choosing a spot with full sun—at least 6 hours daily—and room to grow (20–30 feet wide, depending on the variety). Sweet cherries need cross-pollination, so plant two trees if you want fruit.
The key to late-winter pruning? Focus on opening the canopy to sunlight and air, which means cutting back last year’s growth by about a third to encourage strong new branches.
By summer, you’ll have a tree that’s not just productive but visually stunning—deep green foliage, clusters of white or pink blossoms, and branches heavy with fruit. The right companions (like lavender for pollinators or hostas for shade) make it even more inviting, turning your backyard into a year-round retreat.
Whether you’re dreaming of a classic orchard vibe or a modern minimalist garden, a cherry tree adapts beautifully. The secret? Start with the right cuts now, and you’ll reward yourself with decades of beauty and harvests—not just a tree, but a legacy in your yard.
📚 In This Guide
- What you need
- Instructions
- Tips and common mistakes
- Wrapping up and next steps
What you need
- ● Pruning shears: Bypass pruners (for cuts up to ½ inch thick) – 1 pair (look for sharp, stainless steel blades for clean cuts).
- ● Loppers: For branches ½ to 1½ inches thick – 1 pair (choose ratcheting or bypass loppers for leverage).
- ● Pruning saw: For thicker branches (1½+ inches) – 1 saw (a bow saw or folding pruning saw works best).
- ● Gloves: Heavy-duty, cut-resistant gloves – 1 pair (protects from thorns and scrapes).
- ● Disinfectant: 70% isopropyl alcohol or pruning sealant (to prevent disease spread).
- ● Ladder: Extendable or sturdy step ladder (if tree is over 6–8 feet tall).
- ○ Pruning paint/sealant: (Optional) For sealing large cuts (> ½ inch) – small bottle (helps prevent decay).
- ● Weather check: Prune on a dry, calm day (avoid rain or wind). Ideal temps: 40–60°F (4–15°C).
- ● Safety gear: Safety glasses (to shield from debris) and long sleeves/pants (for thorn protection).
- ● Cleanup supplies: Heavy-duty trash bags (for debris) and a wheelbarrow or bucket (to haul branches away).
- ● Tree health check: Inspect the tree for diseased or dead branches before cutting (tag them with flags if needed).
- ● 🔥 Sharpen your tools! Dull blades tear wood, stressing the tree. Sharpen shears/loppers before you start.
- ● 🌡️ Work in layers: Remove 30% or less of foliage in one session to avoid shocking the tree.
- ● ✨ Sterilize between cuts: Wipe tools with alcohol after each cut to stop fungal/bacterial spread.
How to prune a backyard cherry tree for bountiful summer fruit
Here's my go-to method for late-winter shaping—it boosts fruit production and keeps your tree healthy.
✂️ Step 1: Assess and Remove Dead or Diseased Wood
Start by examining your cherry tree closely. Look for branches that are completely brown, brittle, or showing signs of fungal infection like black spots or oozing sap. These branches won't produce fruit and can spread disease to healthy wood. Grab your pruning shears and cut these branches back to the main trunk or a healthy lateral branch.
I always make my cuts just outside the branch collar—the swollen area where the branch meets the trunk. This ensures the tree can heal properly. If you're dealing with larger branches, use your pruning saw instead. Remember, you're not just cleaning up—you're making room for new, productive growth.
✂️ Step 2: Thin Out Crowded Branches for Better Airflow
Next, focus on the tree's structure. Cherry trees produce better fruit when they have good airflow between branches. Look for areas where branches are growing too close together or crossing each other. These crowded spots create damp conditions that invite fungal diseases and pests.
Select the weaker of the two crossing branches and cut it back to the main trunk or a healthy lateral branch. Aim to maintain an open center—this allows sunlight to reach all parts of the tree and encourages even fruit development. You'll know you're doing it right when you can see light filtering through the canopy.
✂️ Step 3: Shape the Tree for Optimal Fruit Production
Now it's time to shape your tree for maximum fruit production. Cherry trees benefit from a slightly open vase shape, which allows sunlight to penetrate to the inner branches. Start by identifying the main scaffold branches—these are the larger branches that form the tree's structure. Remove any branches that grow straight upward (called water sprouts) or are growing inward.
Make your cuts just outside the branch collar at a 45-degree angle if you're removing larger branches. For smaller branches, a clean cut at the branch collar is fine. Step back occasionally to visualize how your cuts are shaping the tree. You want a balanced, open structure that will support heavy fruit loads without breaking.
⏰ Step 4: Clean Up and Apply Protective Measures
After you've finished pruning, it's time to clean up. Remove all the cut branches and debris from the area around your tree. This prevents disease from spreading and keeps pests away. I like to sterilize my pruning tools with rubbing alcohol between cuts to prevent cross-contamination.
Now's also a good time to apply a fresh layer of mulch around the base of your tree, keeping it 2-3 inches away from the trunk. This helps retain moisture and suppress weeds. If you notice any signs of disease or pest activity during your pruning, treat it immediately with an appropriate fungicide or insecticide. Your tree will thank you with stronger growth and better fruit next season.
Tips & tricks for perfect late-winter cherry tree pruning
Here's what nobody tells you about shaping your cherry tree for maximum summer fruit—lessons from years of trial and error.
Timing is Everything: Late winter is the absolute best time to prune cherry trees because the tree is still dormant but will begin active growth soon. This timing prevents stressing the tree during its growing season. I always aim for just before bud break—typically in late February or early March in most climates. If you miss this window, wait until late spring after flowering, but you'll sacrifice some of the tree's recovery time.
Tool Prep Makes All the Difference: Sterilize your pruning tools before you begin—wipe blades with rubbing alcohol between cuts on different branches. This prevents spreading fungal diseases like brown rot, which is particularly devastating to cherry trees. I also keep a small bucket of soapy water nearby to clean tools after each cut. Sharp tools make cleaner cuts that heal faster, so take 5 minutes to sharpen your shears before starting. A dull blade crushes wood instead of making a clean cut.
The 25% Rule for Pruning: Never remove more than 25% of the tree's foliage in one season—this is critical for maintaining the tree's health. Cherry trees are particularly sensitive to over-pruning. If you're unsure how much you've removed, take a quick photo of the tree before you start and compare it to your progress. You'll know you're doing it right when you can still see plenty of green leaves remaining after your cuts. This rule applies to each individual pruning session, not the entire growing season.
Mulch Matters More Than You Think: After pruning, apply a fresh layer of mulch—keeping it 2-3 inches away from the trunk—as mentioned in Step 4. I use a mix of wood chips and compost for best results. This mulch layer helps retain moisture, suppresses weeds, and slowly releases nutrients back into the soil. The key is to keep it away from the trunk to prevent rot. Think of it as giving your tree a cozy blanket that helps it recover from the pruning stress and prepares it for the growing season ahead.
Pro Tips for Cherry Tree In Backyard
- Here's what nobody tells you about shaping your cherry tree for maximum summer fruit—lessons from years of trial and error.
- Timing is Everything: Late winter is the absolute best time to prune cherry trees because the tree is still dormant but will begin active growth soon.
- Tool Prep Makes All the Difference: Sterilize your pruning tools before you begin—wipe blades with rubbing alcohol between cuts on different branches.
Frequently asked questions
Got questions about pruning your cherry tree for a bountiful summer harvest?
You’re not alone! Here are some of the most common concerns—and straightforward answers—to help you get started with confidence.
When is the exact best time to prune a cherry tree in late winter?
Prune your cherry tree before buds swell (typically late February to early March in most U.S. zones). This timing encourages vigorous spring growth and sets the stage for fruit production. Avoid pruning during frost or extreme cold—wait for a mild, dry day. Pro tip: Sweet cherries (like Bing) need pruning earlier than sour cherries (like Montmorency).
How much can I cut back without hurting my tree?
Remove no more than 25% of the tree’s total branches in one season. Focus on dead, crossing, or crowded branches first. For young trees, you can be more aggressive (up to 30%) to shape the structure. Warning: Over-pruning stresses the tree and reduces fruit yield. If unsure, err on the side of caution!
Will pruning now affect this year’s cherry harvest?
Yes—but in a good way! Late-winter pruning stimulates new growth that will bear fruit later in the season. However, if you prune too late (after buds break), you’ll delay fruit production. Think of it like a haircut: timing matters! For heavy-bearing trees, spread pruning over 2–3 years to avoid shocking the tree.
Do I need to sterilize my pruners between cuts?
Absolutely!
Disinfect pruners with rubbing alcohol or a 10% bleach solution between cuts to prevent spreading bacterial diseases (like silver leaf) or fungal infections. This is especially critical if your tree has had past issues. Pro tip: Keep a small spray bottle of diluted bleach handy for quick cleanups.
What if my cherry tree has no branches to prune?
If your tree is overgrown or leggy, prioritize:
- Thinning out suckers (shoots growing from the base).
- Removing water sprouts (vertical shoots with no leaves).
- Opening the canopy to improve airflow and sunlight.
Can I prune a cherry tree in containers or small backyards?
Yes! Dwarf or semi-dwarf varieties (like ‘Stella’ or ‘Balaton’) are perfect for containers or tight spaces. Prune them more aggressively (up to 30%) to maintain shape, but still follow the 25% rule for mature trees. Use well-draining soil and a large pot (15+ gallons) to prevent root stress.
Wrapping up and next steps
Planting a cherry tree in your backyard is a rewarding investment—one that pays off with luscious fruit and stunning blooms. Late-winter pruning isn’t just about shaping; it’s about setting your tree up for a bountiful summer harvest.
With the right tools, timing, and technique, you’ll encourage strong growth, better air circulation, and fewer pests. Now that you’re armed with the how-to and FAQs, there’s no better time to grab your pruners and get started!
🌱 Next step: Mark your calendar for late winter (just before buds swell) and take action. Your future self—and your taste buds—will thank you!