
Propagation
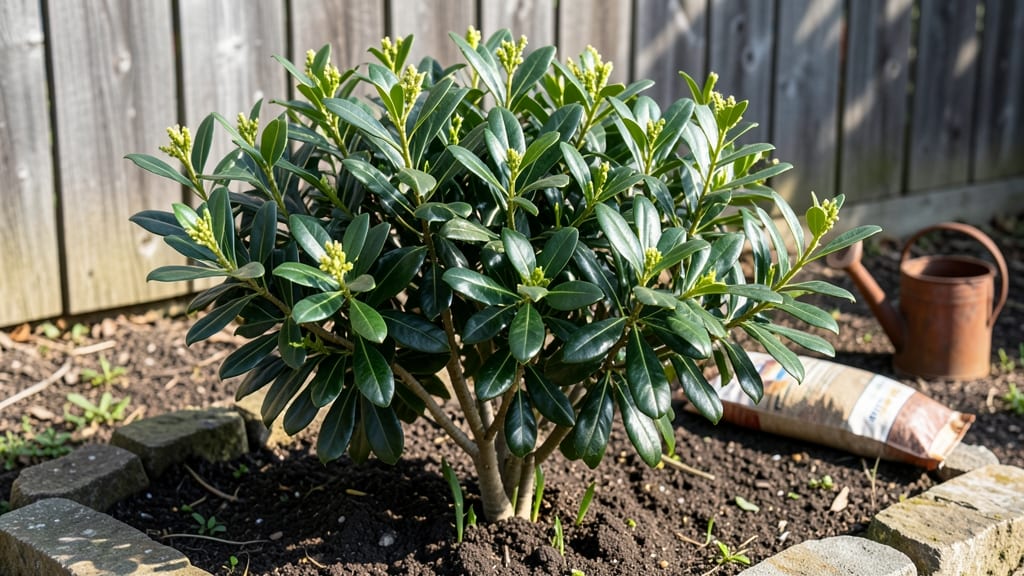
That gnarled old bay tree stump in your yard might still have life to give—bay tree shoots from roots is how you unlock a second chance at lush, fragrant foliage without buying new plants.
I’ve regrown multiple bay trees this way, and the first tender shoots always make me smile like it’s Christmas morning in the kitchen garden.
The secret lies in patience and timing—spring or early fall gives roots the best shot at sending up vigorous new growth. You’ll need a sharp knife, rooting hormone (optional but helpful), and a pot or garden bed with well-draining soil.
Even stubborn stumps can produce 3-5 healthy shoots within a few months if you keep the soil consistently moist but not soggy.
Imagine harvesting fresh bay leaves year after year from trees you nurtured back to life. The glossy green leaves will smell like your grandmother’s kitchen, and the tree’s sturdy structure makes it perfect for hedges or container growing.
This method works for both potted and outdoor bay trees, including the classic Laurus nobilis—just give it time and tender care.
Fair warning: Some roots take longer to sprout than others, and you might need to prune competing shoots to focus energy. But the payoff—free, fragrant bay trees—makes every bit of effort worth it. Let’s get those roots growing!
📚 In This Guide
- What you need
- Instructions
- Tips and common mistakes
- Wrapping up and next steps
What you need
- ● Bay tree stump: A healthy, recently cut stump (preferably less than 6 months old) with visible roots or a thick base.
- ● Pruning shears or handsaw: For trimming excess growth or shaping the stump if needed.
- ● Garden trowel or spade: To dig around the stump and expose roots (if buried).
- ● Well-draining potting mix: A blend of 50% peat moss or coconut coir and 50% perlite or coarse sand (about 5–10 gallons, depending on stump size).
- ● Large container or pot: At least 12–18 inches in diameter and 12+ inches deep (or a nursery bed if propagating outdoors).
- ○ Rooting hormone (optional but recommended): A powder or gel to boost root growth (e.g., Clonex or Rootone).
- ○ Mulch (optional): Shredded bark or straw to retain moisture around the stump.
- ● Patience: Bay trees grow slowly—expect new shoots in 4–12 weeks, depending on conditions.
- ● Sunlight: A spot with 6+ hours of indirect sunlight daily (bay trees thrive in bright, filtered light).
- ● Consistent moisture: Keep the soil evenly damp but not soggy (bay roots hate waterlogging!).
- ● Warmth: Ideal temperatures between 60–75°F (15–24°C) for optimal growth.
How to regrow a bay tree from existing roots
Here's how I've successfully revived bay trees from old stumps—no special tools needed.
Identify and Prepare the Root System
Look for healthy roots radiating from the base of your old bay tree stump. These roots should be firm to the touch and at least ½ inch thick. If the stump is completely dead, you won’t get new shoots—focus on stumps with some living tissue underneath the bark.
Use a sharp knife to make a clean, vertical cut about 2 inches deep around the stump, circling it completely. This helps expose the root system and encourages new growth. Be careful not to damage the roots beneath—you want to stimulate them, not sever them.
Encourage Sprouting With Water and Mulch
Water the base of the stump thoroughly until the soil is damp 6 inches deep. Bay trees need consistent moisture to regenerate, so keep the soil evenly moist but not soggy. You’ll know it’s right when water drains away within a few minutes but the top layer stays slightly damp.
Spread a 2-inch layer of mulch around the base, keeping it 6 inches away from the stump to prevent rot. Mulch retains moisture and protects the roots from temperature swings. Check the soil weekly—if it feels dry, water again until moisture reaches 4-6 inches down.
Monitor for New Shoots and Thin as Needed
New shoots will appear within 4-8 weeks, often in clusters. They’ll start as small, pale green sprouts about 1-2 inches tall. Once they reach 3-4 inches, you’ll notice thicker stems and darker leaves—this is your cue that they’re strong enough to survive on their own.
If more than one shoot emerges, thin them to leave the 3-4 healthiest closest to the stump. Use clean pruning shears to snip the extras at the base. Overcrowding weakens the remaining shoots, so don’t hesitate to remove extras early—it’s better to do it now than later.
Support and Transplant Young Trees
After 6-12 months, when shoots are 1-2 feet tall, they’ll need staking. Drive a 3-foot stake into the soil 6 inches from the shoot and tie it loosely with soft garden twine. This prevents wind damage while the roots establish.
Once the shoots are 2-3 feet tall and have developed a strong root system (usually after 1-2 years), you can transplant them. Dig around the base carefully to avoid breaking roots, then replant in a location with full sun to partial shade and well-draining soil.
Maintain for Long-Term Growth
Water newly transplanted bay trees deeply once a week during the first year, ensuring moisture reaches 12 inches down. After establishment, they’re drought-tolerant but still prefer consistent moisture. You’ll know they’re thriving when new leaves appear in spring and the tree grows 6-12 inches per year**.
Prune lightly in late winter to shape the tree and remove dead branches. Bay trees respond well to pruning, so don’t be afraid to trim back overgrowth—just avoid cutting into old wood, as it won’t regenerate. With patience, your regrown bay tree will live for decades, just like the original.
Tips & tricks for perfect bay tree regrowth
Reviving a bay tree from old roots takes patience, but these insights will help you maximize success without the guesswork.
Root Health Check: Before making your 2-inch deep cut around the stump, gently press your fingernail into the bark. If it leaves a slight indentation that slowly springs back, there's still living tissue beneath. Healthy roots should feel firm but yield slightly—think of them like a ripe avocado, not a rock. This test tells you whether your stump has the potential to sprout new growth.
Watering Wisdom: The 6-inch deep watering in Step 2 is non-negotiable, but timing matters just as much. Water in the early morning so the moisture has time to penetrate before the heat of the day. I've seen many gardeners overwater in the evening, which can lead to fungal issues. Use a moisture meter if you're unsure—aim for soil that feels like a damp sponge, not a wet rag.
Mulch Placement Pro Tip: When spreading that 2-inch layer of mulch 6 inches from the stump, create a slight mound around the base. This helps channel water directly to the roots during heavy rains. I've found that mulch piled too flat can actually wash away during storms, leaving the roots exposed. A gentle slope keeps everything in place while still protecting the roots from temperature swings.
Shoot Selection Strategy: When thinning to 3-4 healthiest shoots, look beyond just size. Check for vibrant green color and firm stems—these are your best indicators of strong growth. I've made the mistake of keeping a slightly larger but pale shoot, only to watch it wither while the smaller green ones thrived. Health comes first, size second.
Pro Tips for Bay Tree Shoots From Roots
- Reviving a bay tree from old roots takes patience, but these insights will help you maximize success without the guesswork.
- Root Health Check: Before making your 2-inch deep cut around the stump, gently press your fingernail into the bark.
- Watering Wisdom: The 6-inch deep watering in Step 2 is non-negotiable, but timing matters just as much.
Frequently asked questions
Got questions about regrowing bay trees from roots?
You’re not alone! Here are some of the most common concerns—and straightforward answers—to help you succeed with this rewarding propagation method.
How long does it take for bay tree shoots to appear from the roots?
Patience is key! With consistent moisture and warmth (60–75°F), you’ll typically see tiny green shoots in 4–8 weeks. Some stubborn roots may take up to 3 months—keep the soil damp and avoid overwatering, which can rot the stump.
Can I regrow a bay tree from a store-bought stump (like a bouquet remnant)?
Yes, but success depends on the stump’s condition. Look for fresh, plump roots (not dried out) and a 2–3 inch base. Soak it in water for 24 hours first to rehydrate, then plant in moist soil. Store-bought stumps work best if they’re still green when you start!
Why aren’t my bay tree roots sprouting? Troubleshooting tips
No shoots? Check these fixes:
- Dry soil: Roots need consistent moisture—water lightly every 2–3 days.
- Poor light: Place near bright, indirect sunlight (a south-facing window is ideal).
- Rot: If the stump smells foul or feels mushy, trim away damaged areas and replant in fresh soil.
- Cold temps: Bay trees thrive in warmth—keep above 50°F.
Can I use this method for other herbs (like rosemary or thyme)?
While bay laurel roots regrow reliably, most other herbs (rosemary, thyme, oregano) don’t sprout from stumps. Stick to hardwood cuttings or seeds for those. Bay trees are the superstars of root regrowth!
How big should the stump/root base be for best results?
Aim for a 2–4 inch diameter stump with visible, healthy roots. Smaller pieces (under 1 inch) may struggle, but don’t toss them—plant them shallowly in soil and keep them humid. Larger stumps (5+ inches) can produce multiple shoots!
Wrapping up and next steps
Watching a bay tree regrow from its roots is like nature’s own magic trick—simple, rewarding, and full of potential! 🌱 Whether you’re reviving a beloved stump or starting fresh, this method proves that even the smallest piece of life can bloom into something beautiful.
Now that you’re armed with the know-how, why not give it a try? Grab your tools, find that dormant stump, and let the greenery grow—your future bay tree (or kitchen herb garden) is waiting!
Next steps:
- 🔍 Spot a stump: Check your yard or a local nursery for leftover bay tree roots.
- 🌱 Plant and nurture: Follow the steps above and keep an eye on those sprouts!
- 📸 Share the joy: Snap a pic of your progress and tag us—we’d love to see your success!